

Recording Experience Customization (Premium Feature)
Last updated July 21, 2026
Overview
Customize the recording experience so it reflects your brand and feels familiar to your audience.
With design and messaging controls, you can tailor what contributors see when they record - everything from colors and logos to the language used throughout the experience. This helps create a more consistent, recognizable experience, especially when sharing recording links with external audiences or running targeted campaigns.
Customize Design
Tailor the look and feel of the recording experience so it perfectly matches your brand colors, logo, and more.
This is a white-label feature that allows admins to fully brand the recording experience. Instead of seeing Spokn branding, contributors will see your company’s branding when they record.
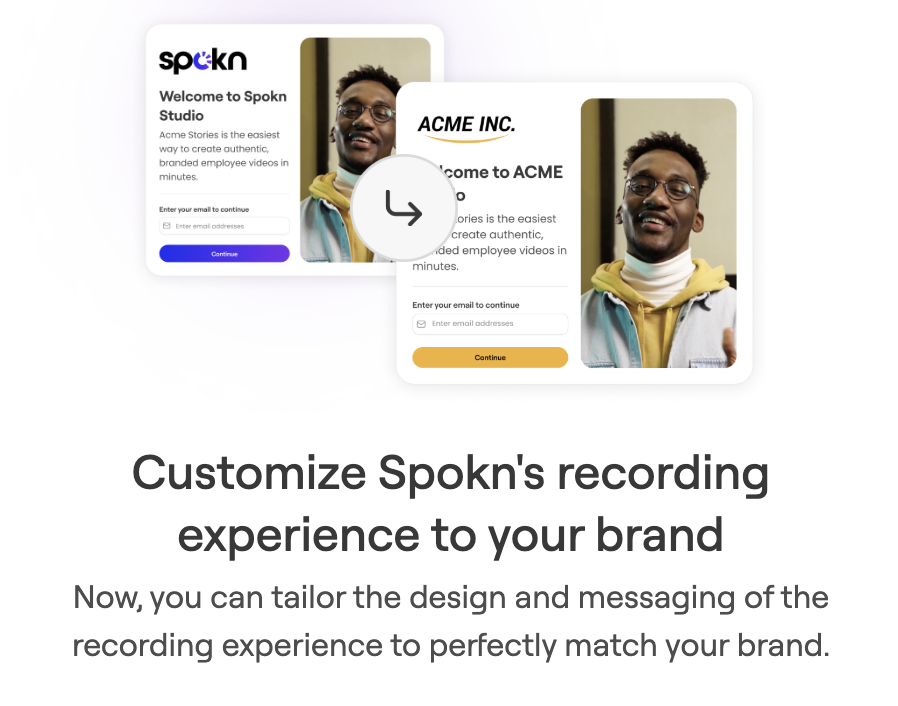
What you can customize
- Color mode (white or dark background)
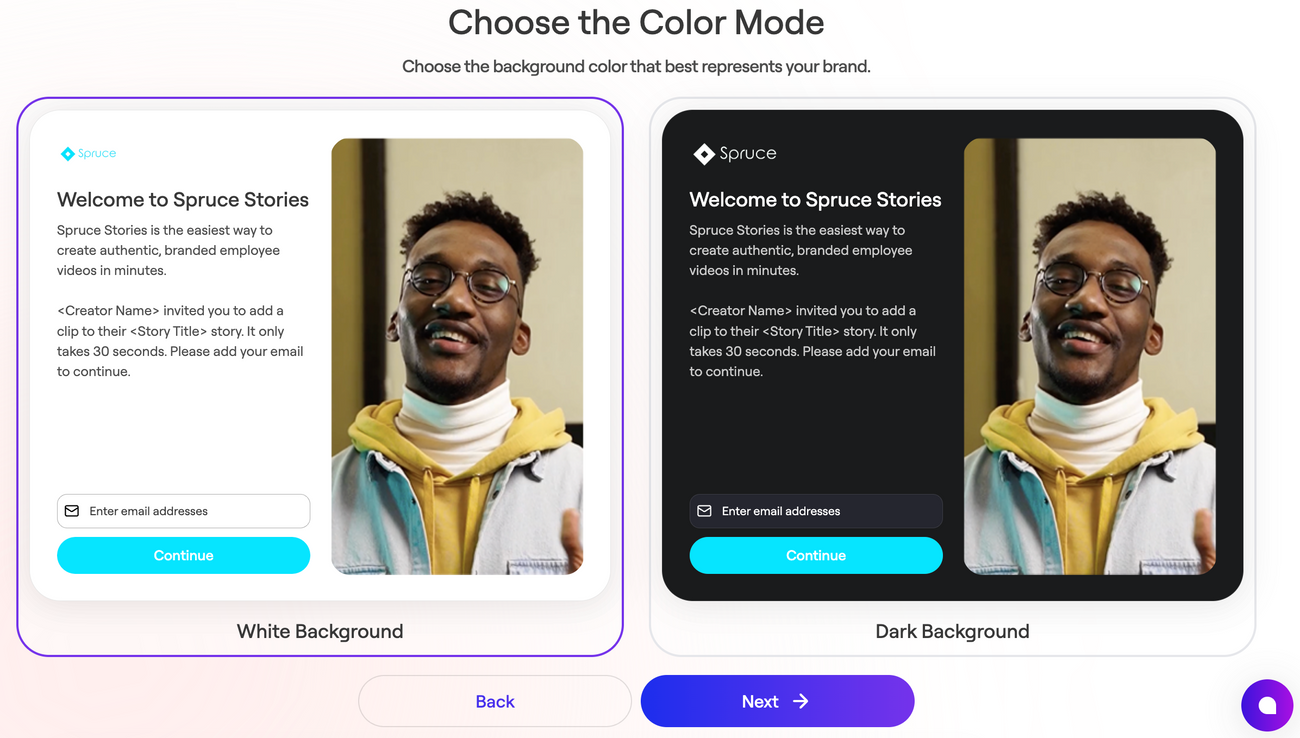
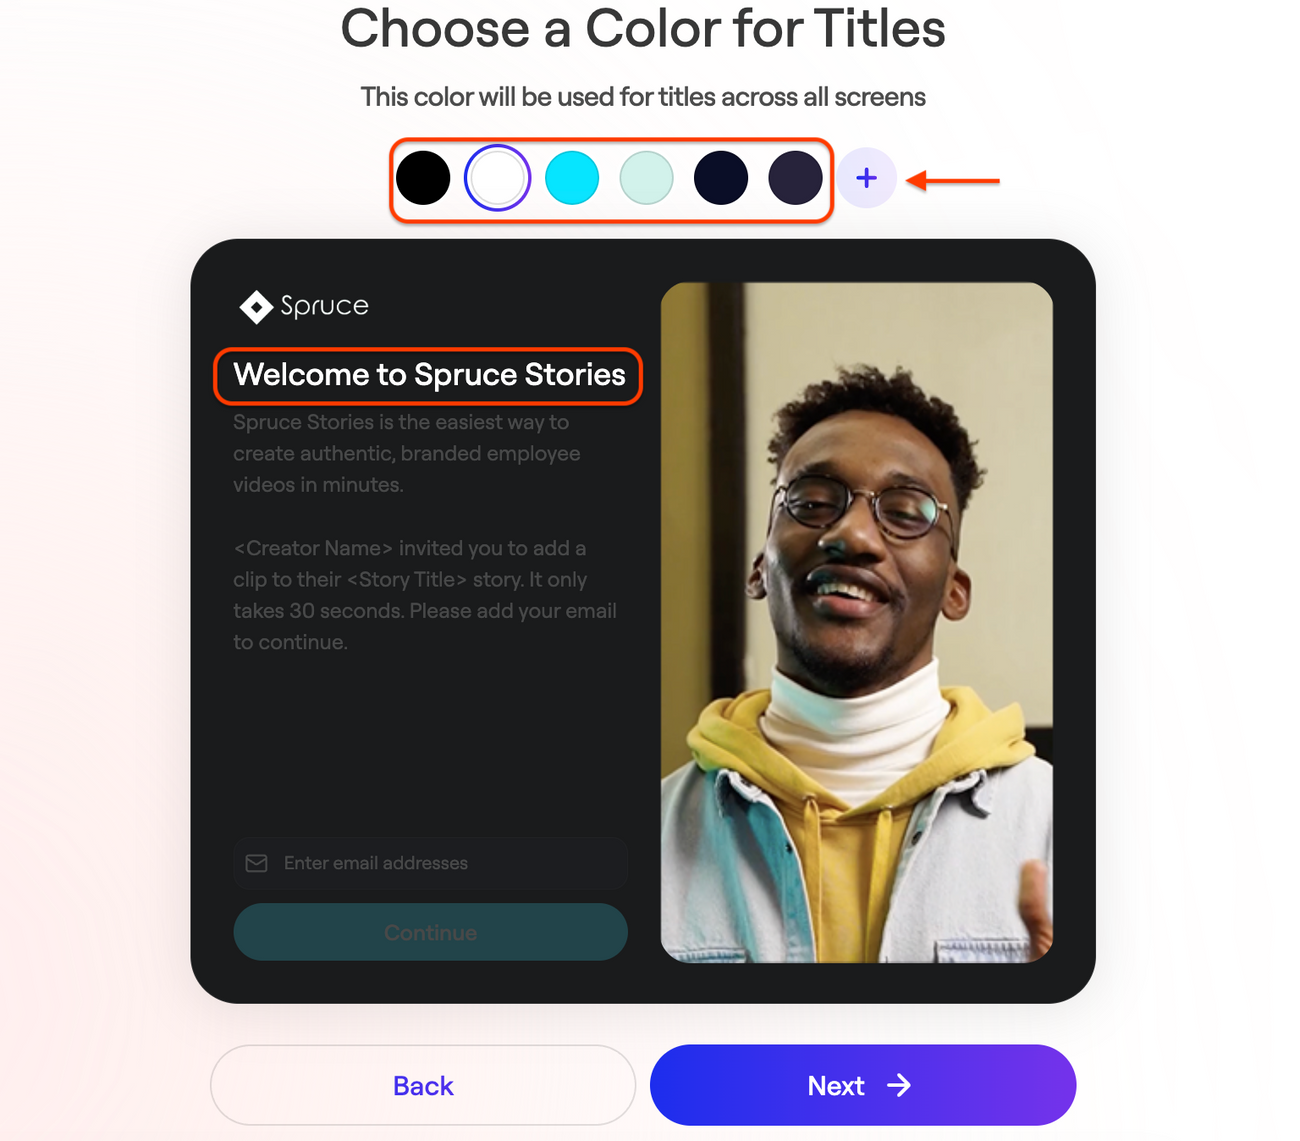
- Title color
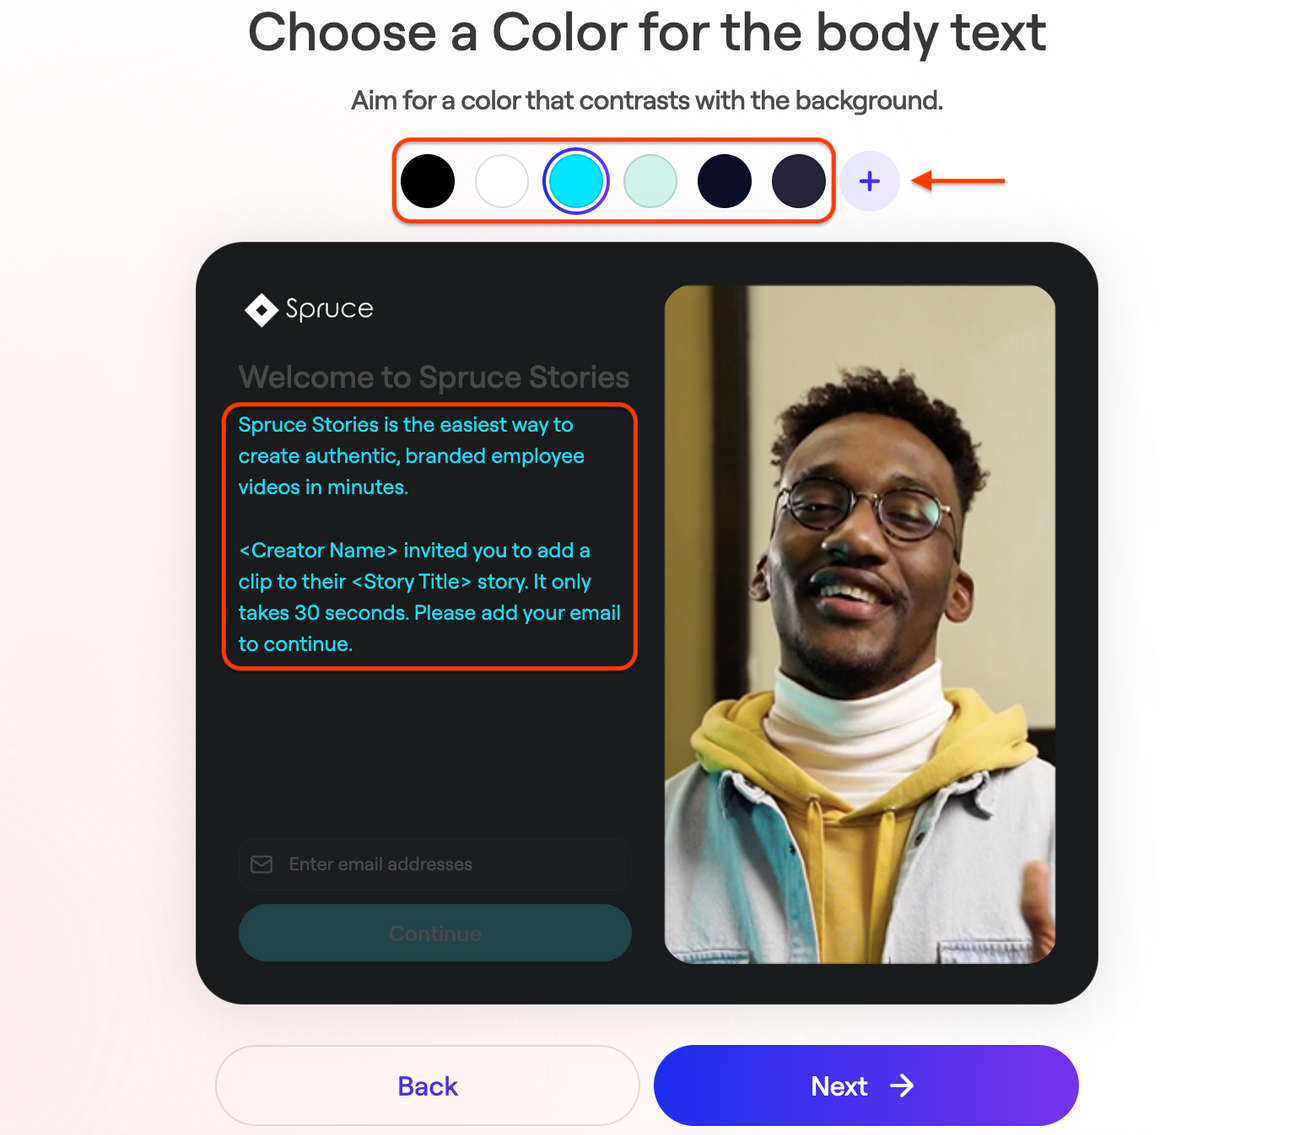
- Body text color
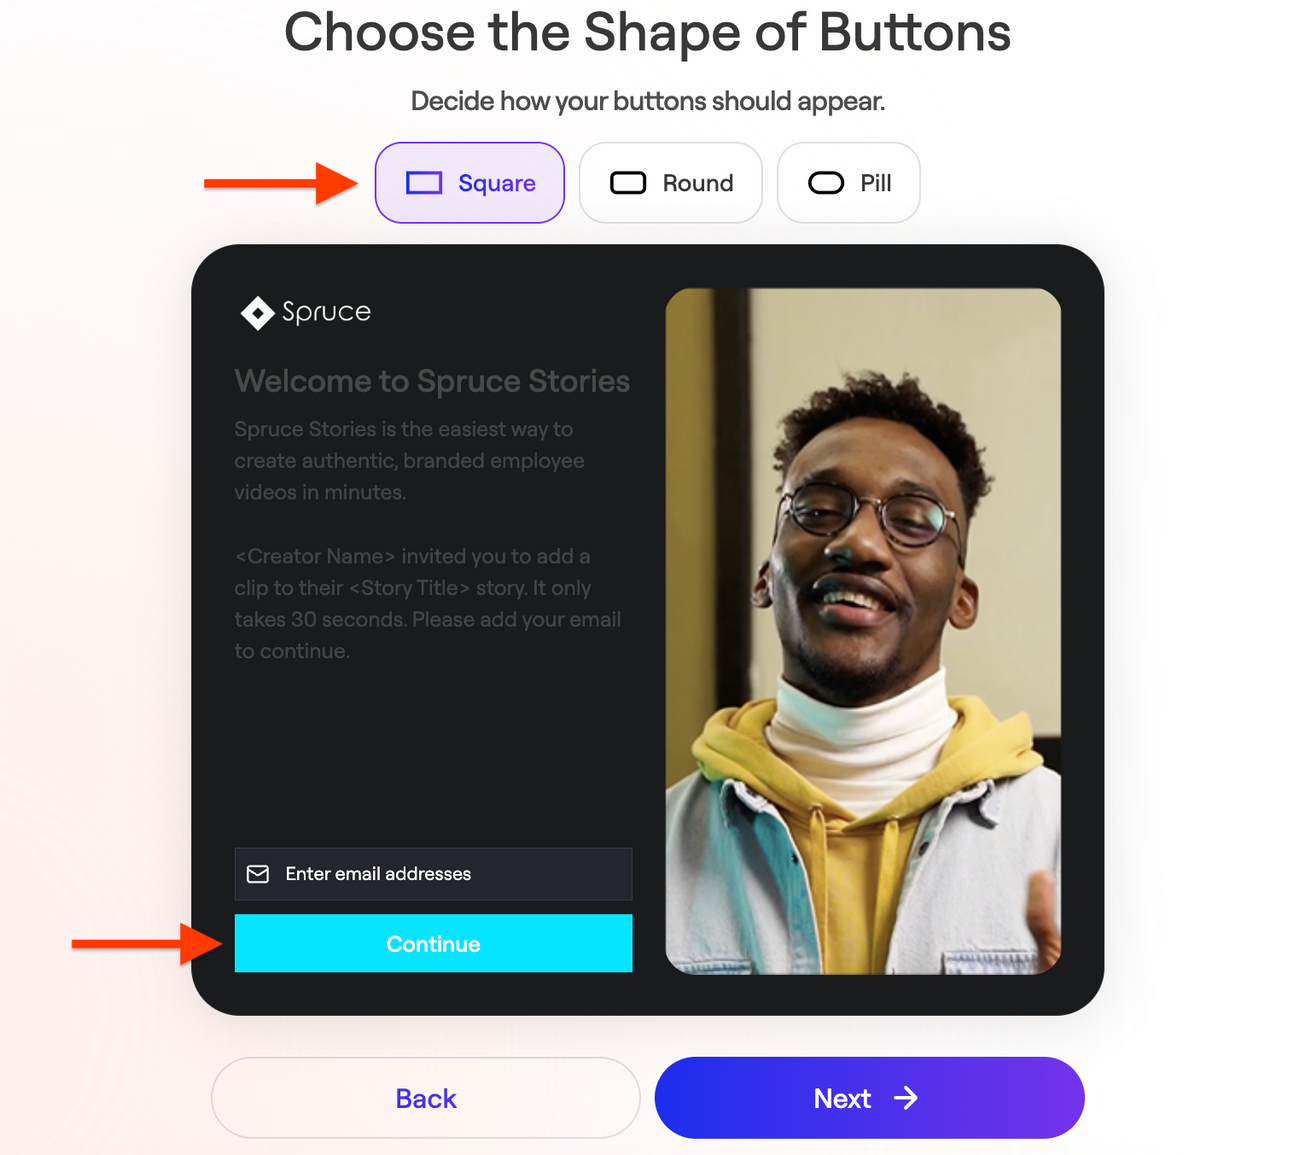
- Button shape
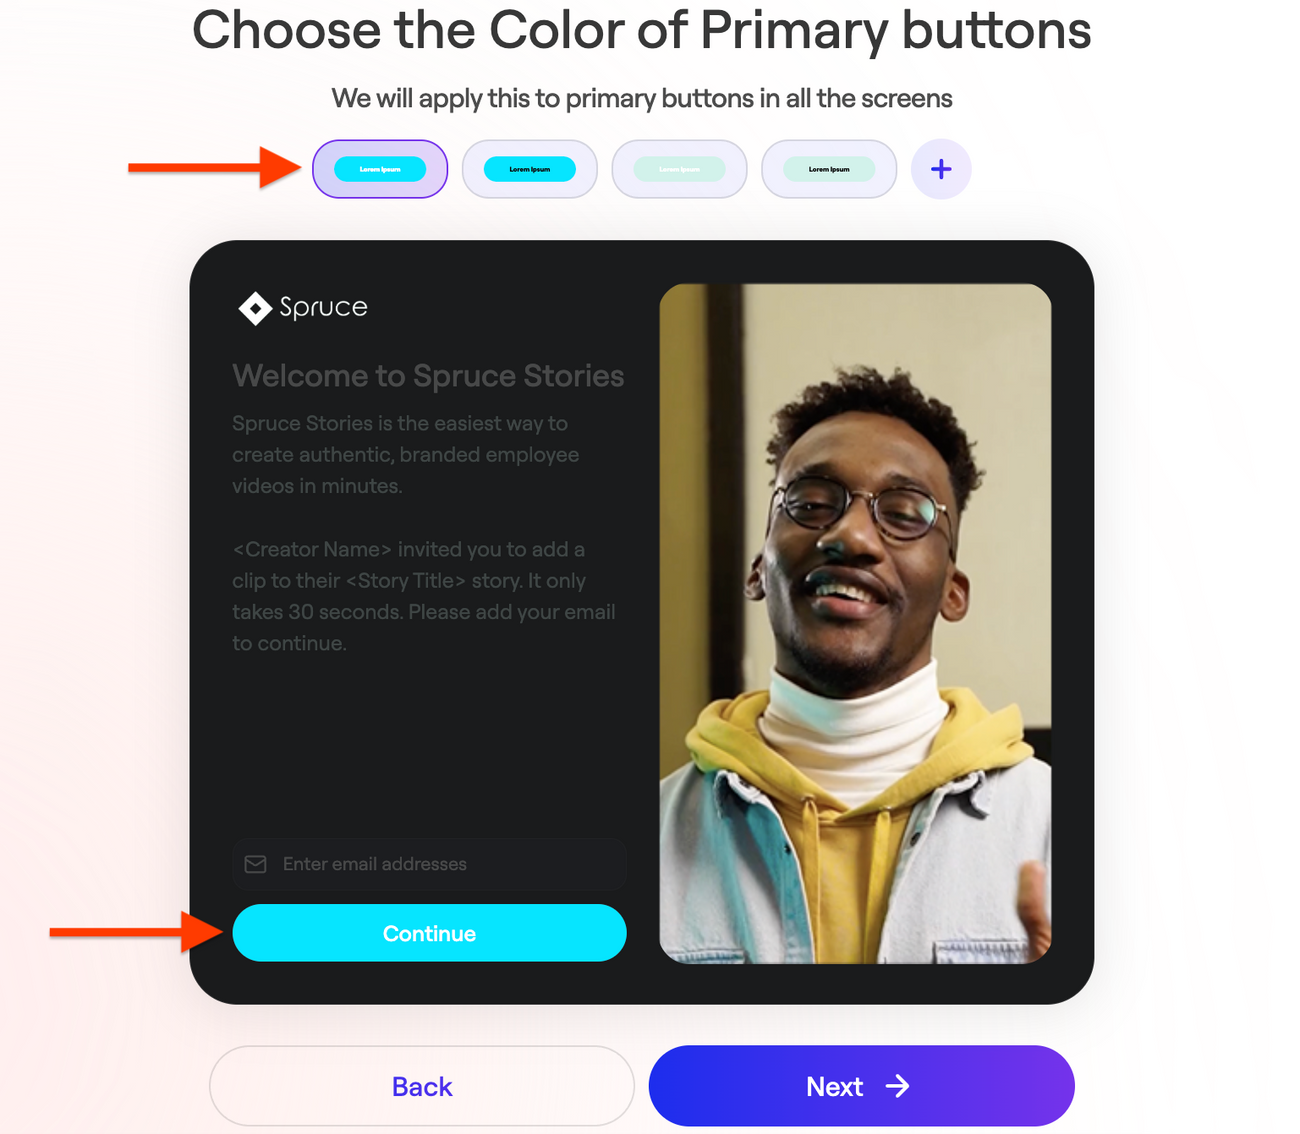
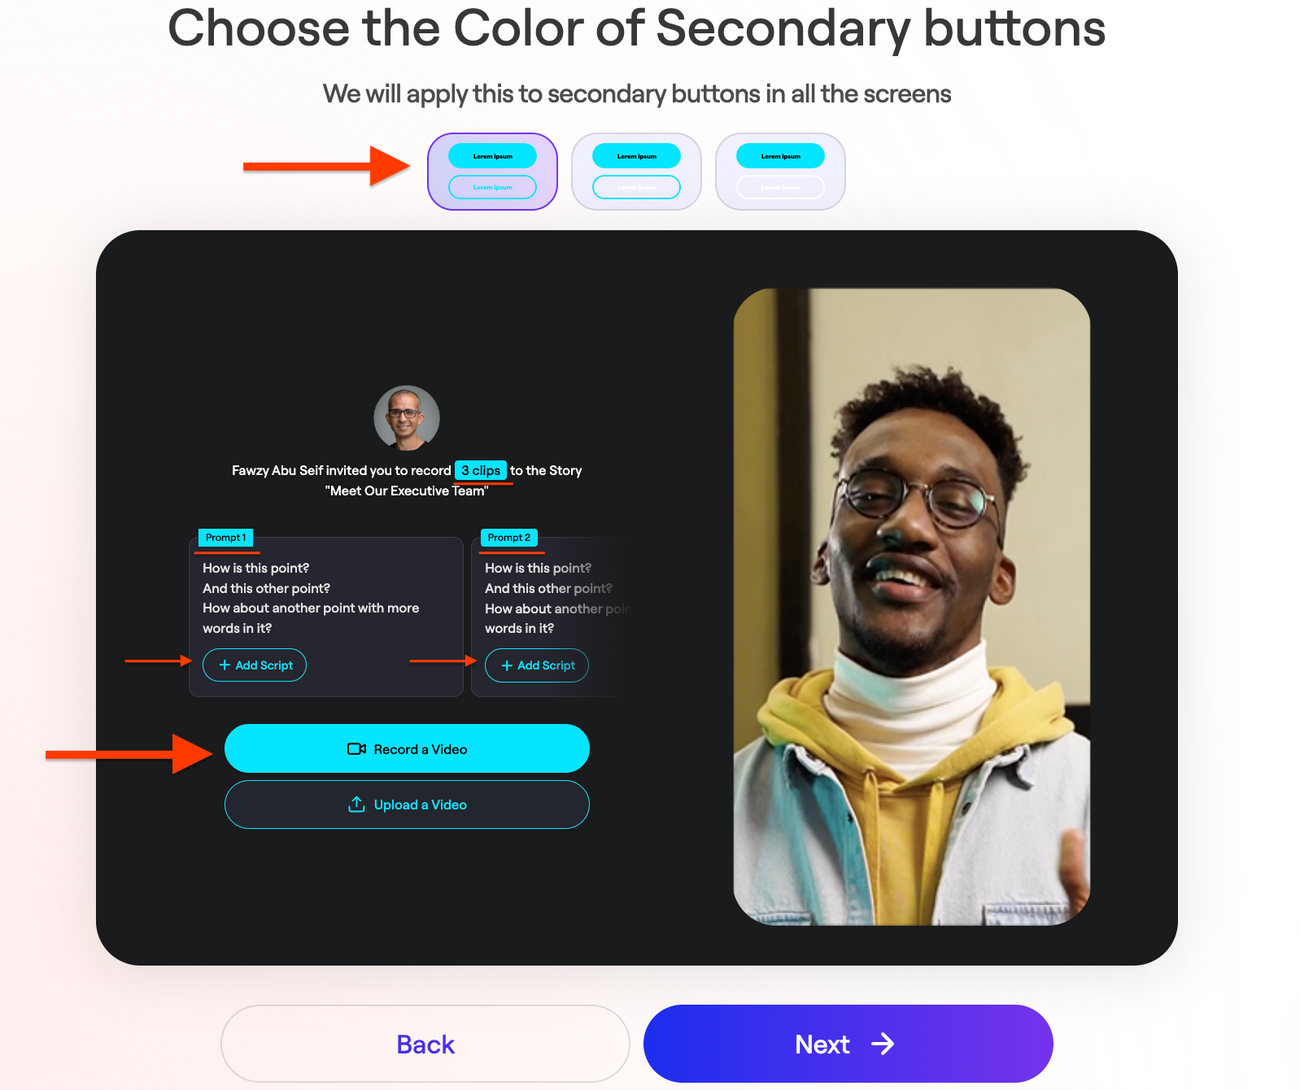
- Button primary and secondary and colors
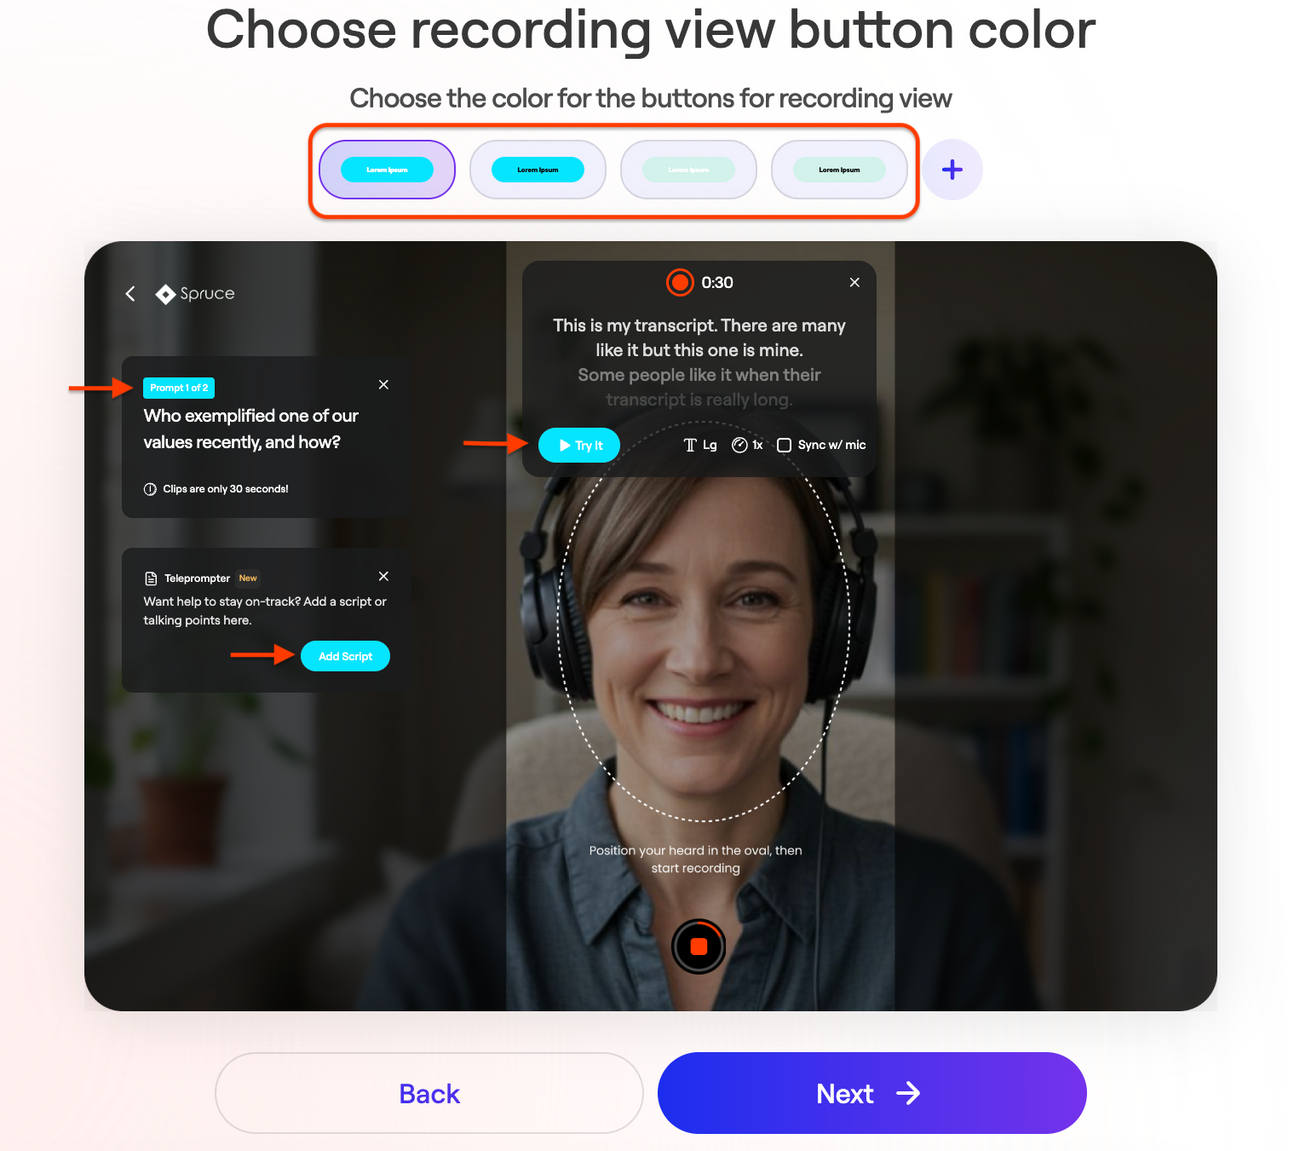
- Recording view button color
- Company logo (replacing Spokn's logo)*
*Logos from your branding kit will appear by default and can’t be further modified at the design level.
How to customize design
- Click Home on the left pane
- Click Customize Experience
- Start customizing the design
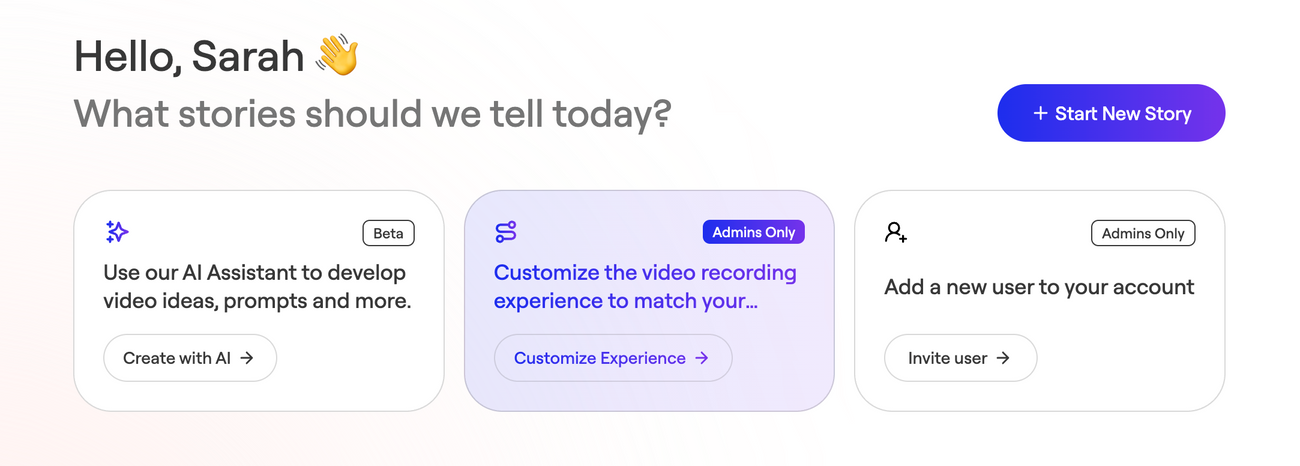
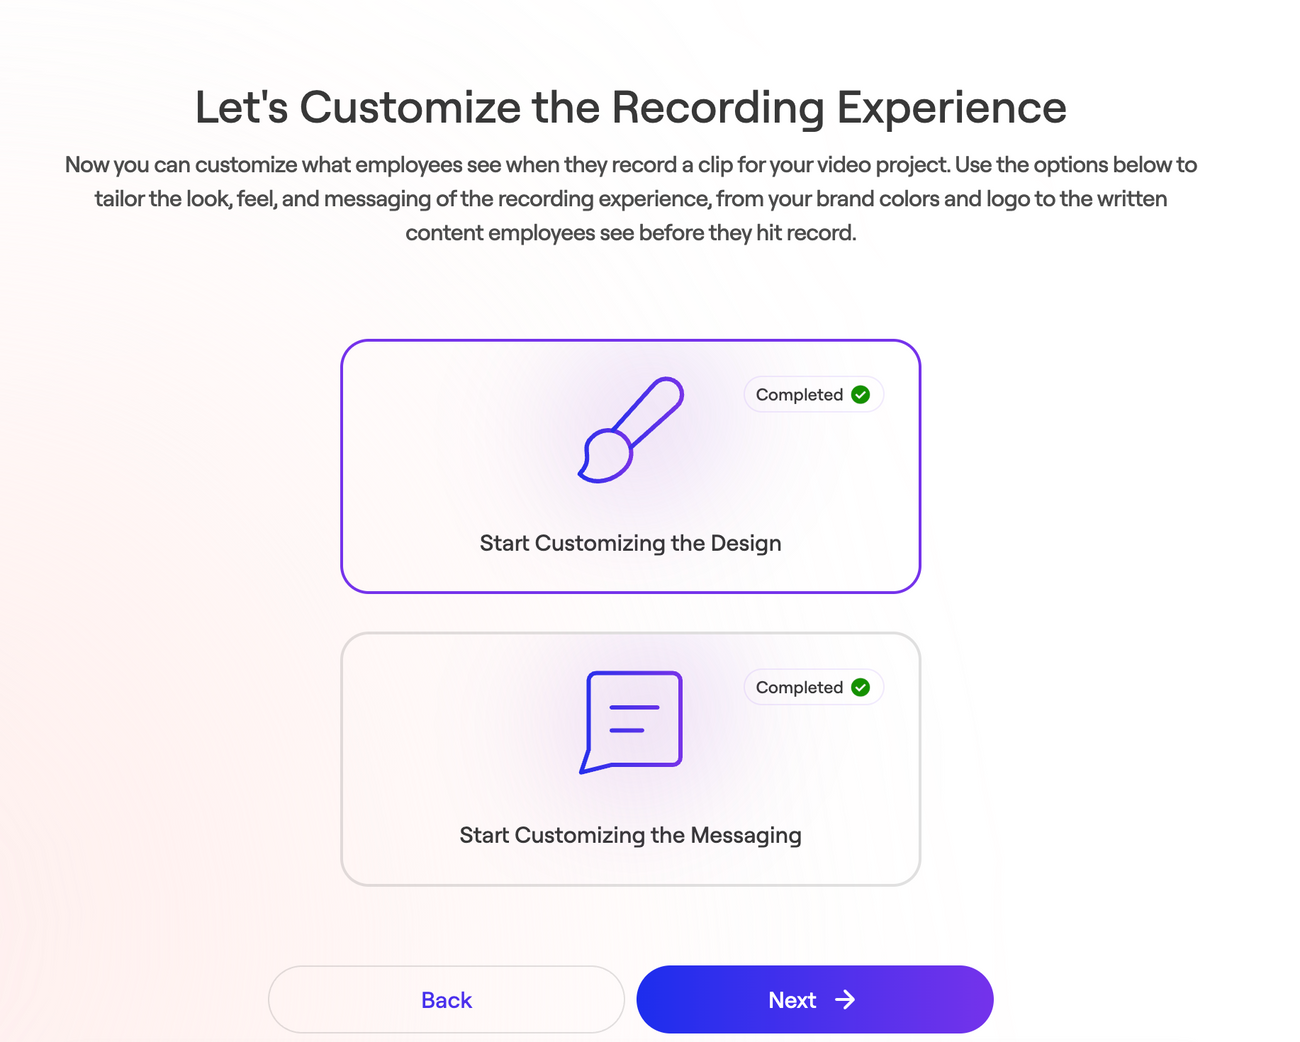
Or
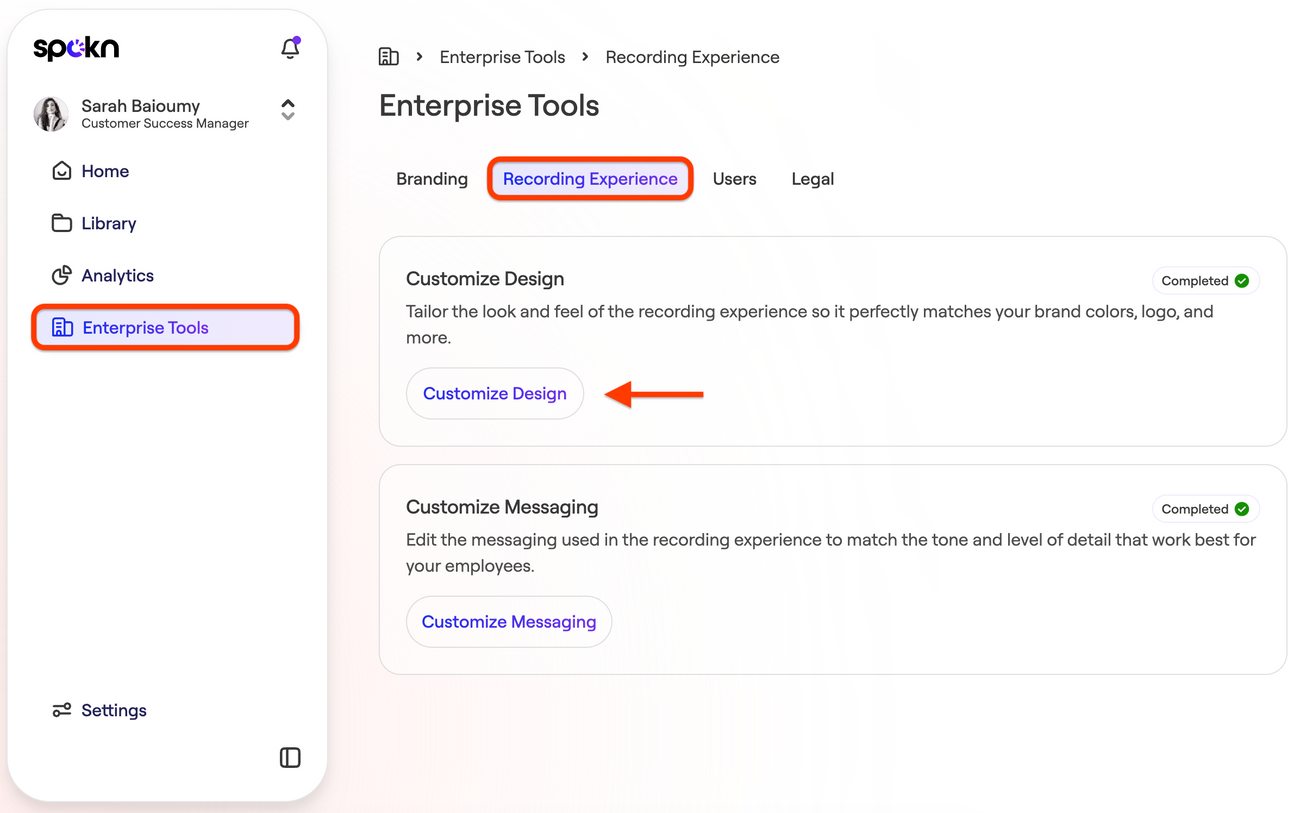
- Click Enterprise Tools on the left pane
- Click Recording Experience
- Click Customize Design
Customize Messaging
Update the messaging in the recording experience to match your tone and the level of detail you want to include.
This is especially useful when sharing recording links with external audiences (like customers or partners), where unfamiliar branding may cause hesitation.
What you can customize
All text and copy in the recording experience:
- The welcome message
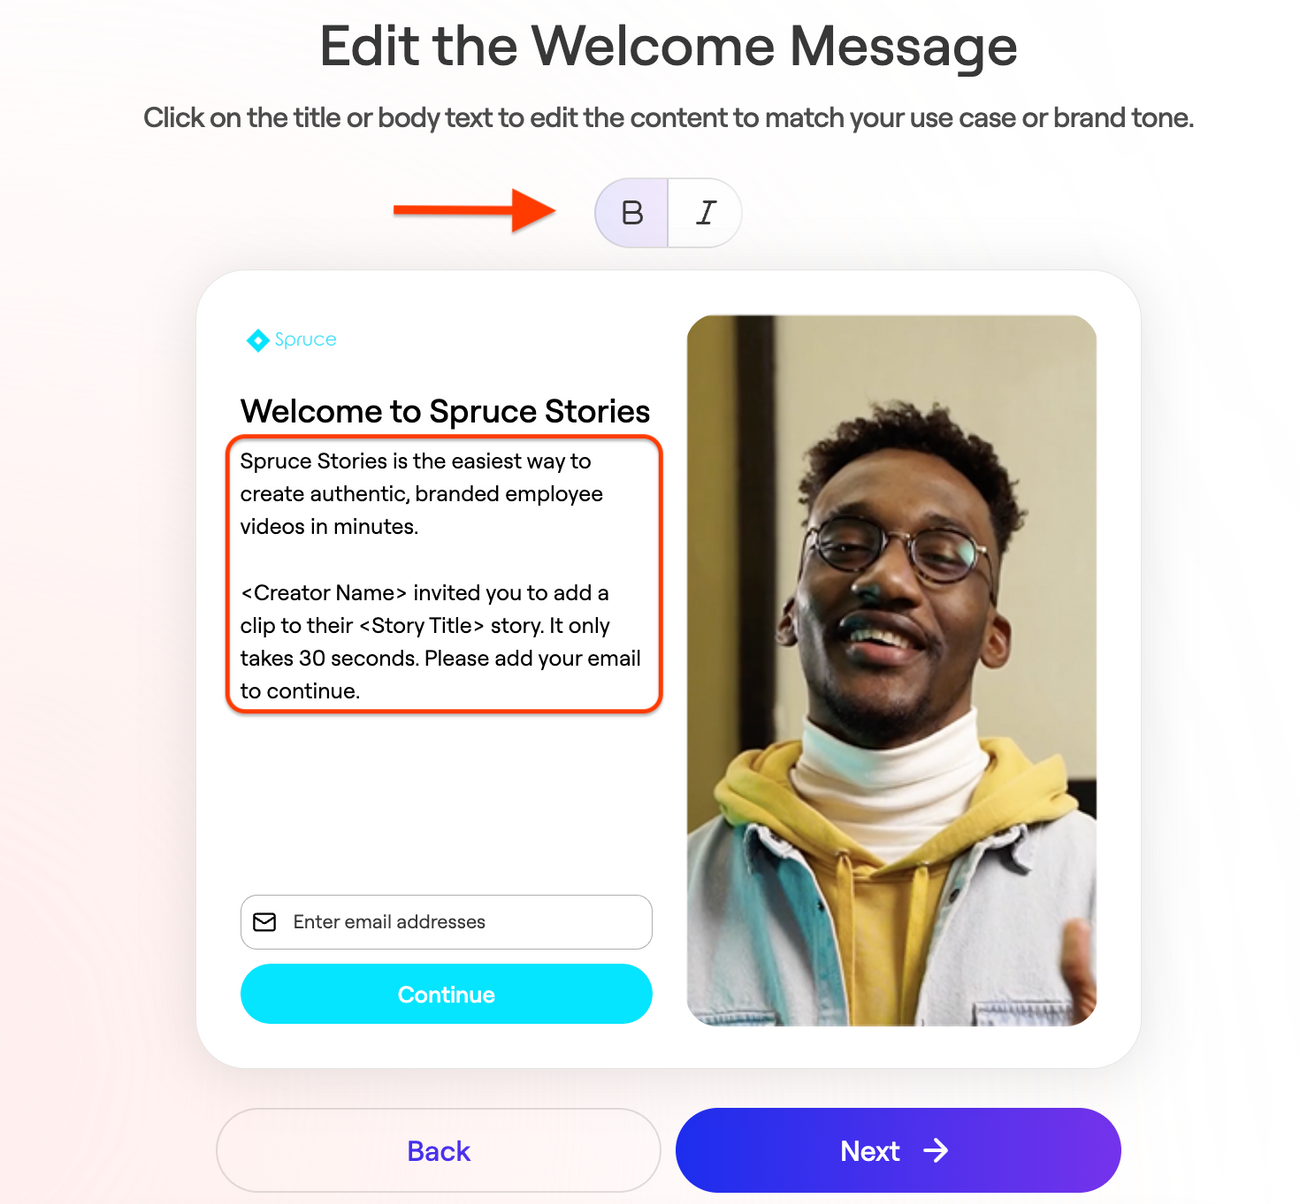
- Invitee information form
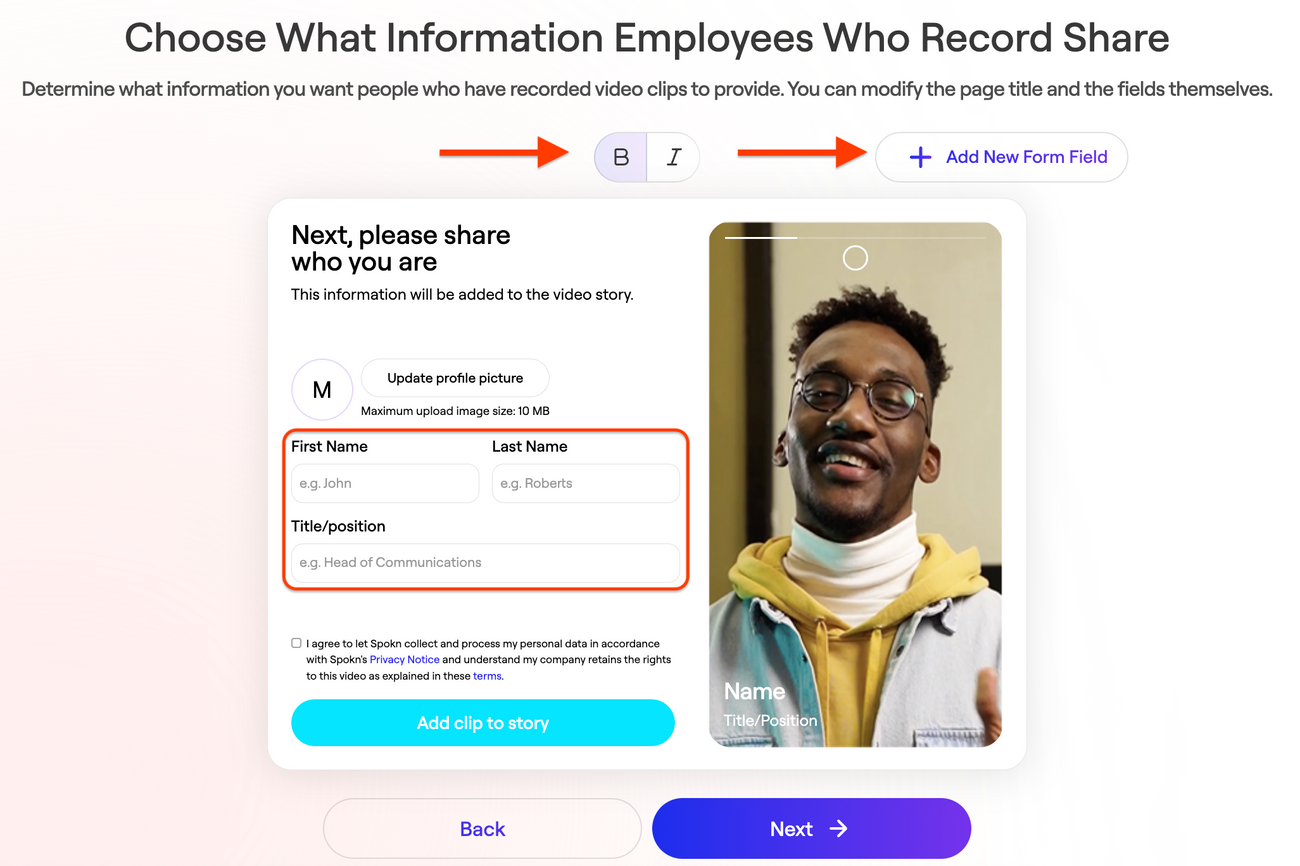
- Success message
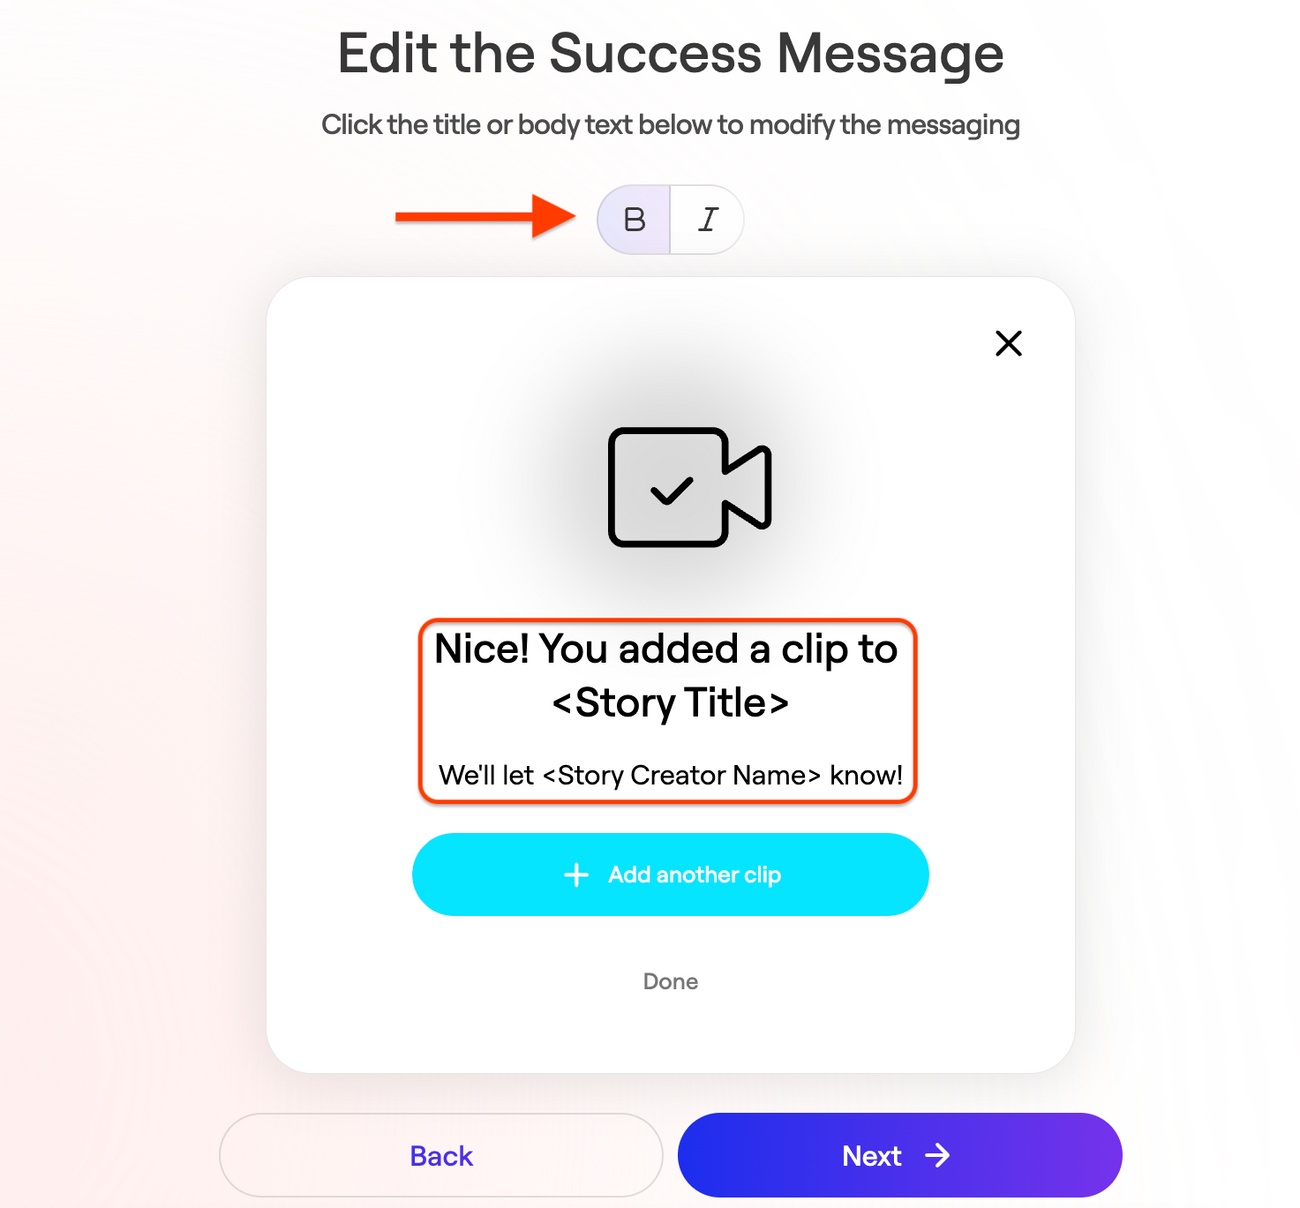
This can be updated on a per-project basis (e.g., "Welcome, Harvard students…" for a specific university partner campaign).
How to customize messaging
You can customize messaging in two places:
At the account level (applies to all new stories by default)
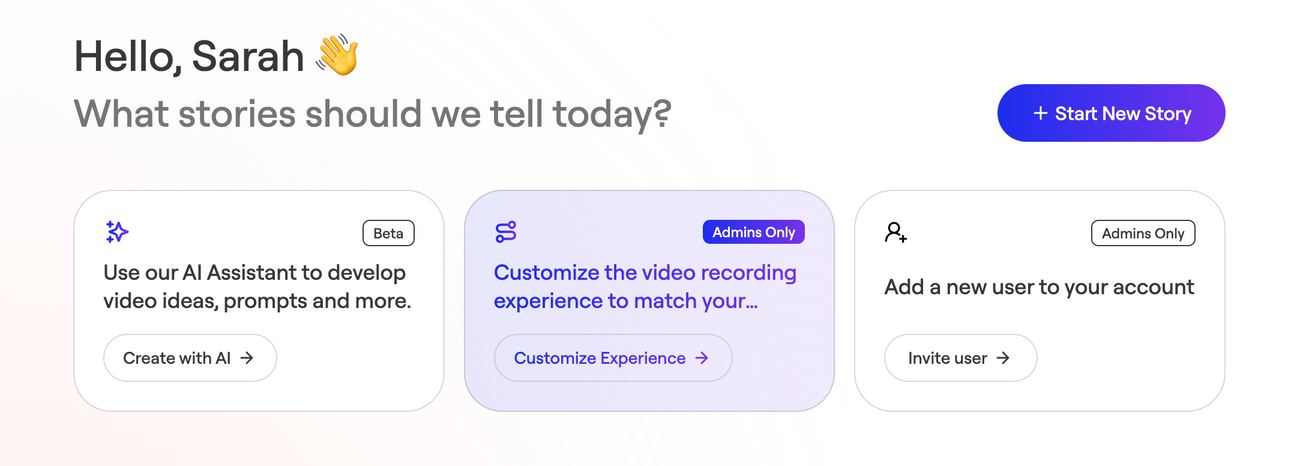
- Click Home on the left pane
- Click Customize Experience
- Start customizing the messaging
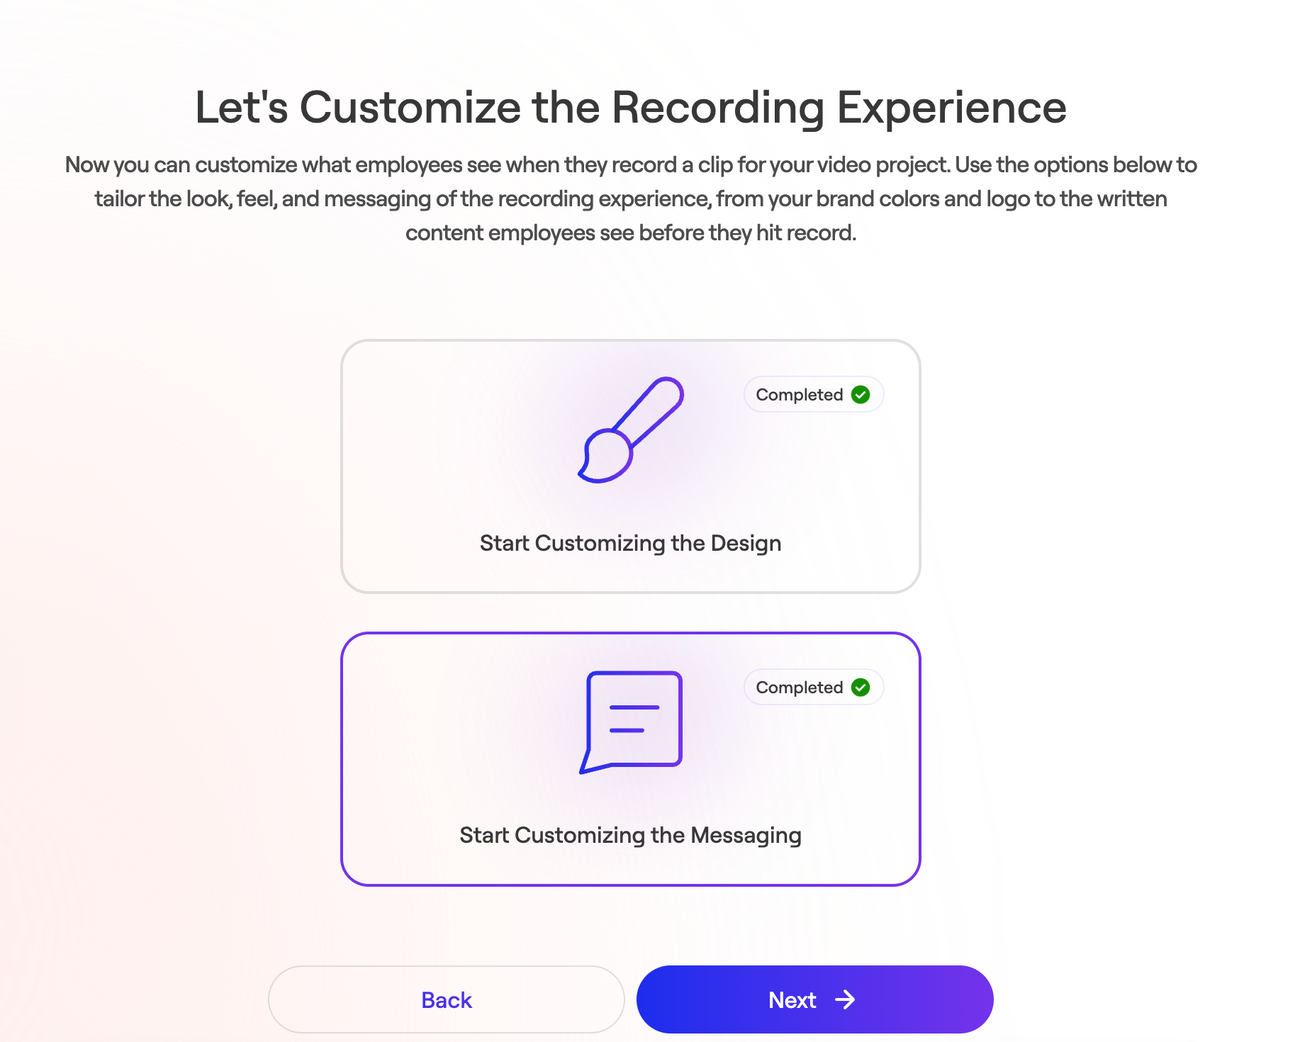
Or
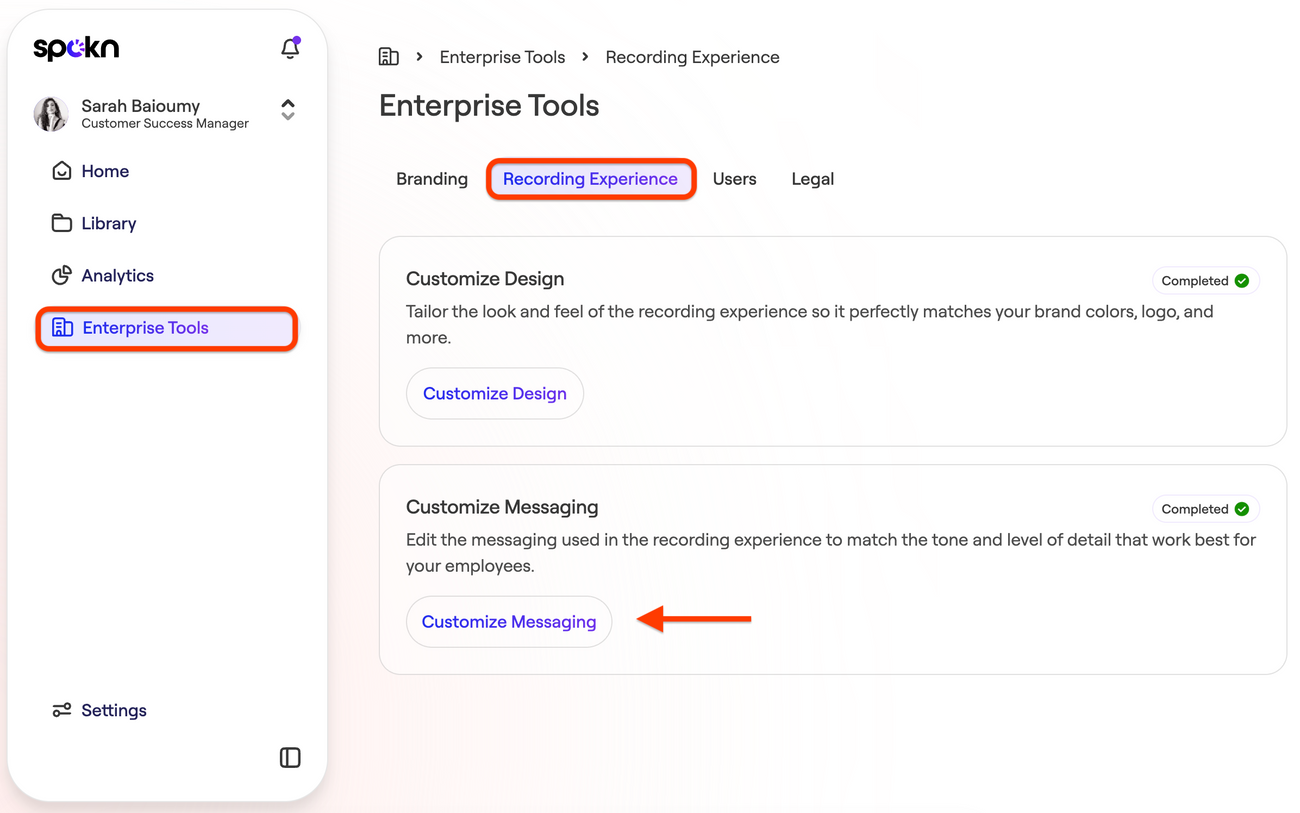
- Click Enterprise Tools in the left panel
- Click Recording Experience
- Click Customize Messaging
At the story level (unique to each story)
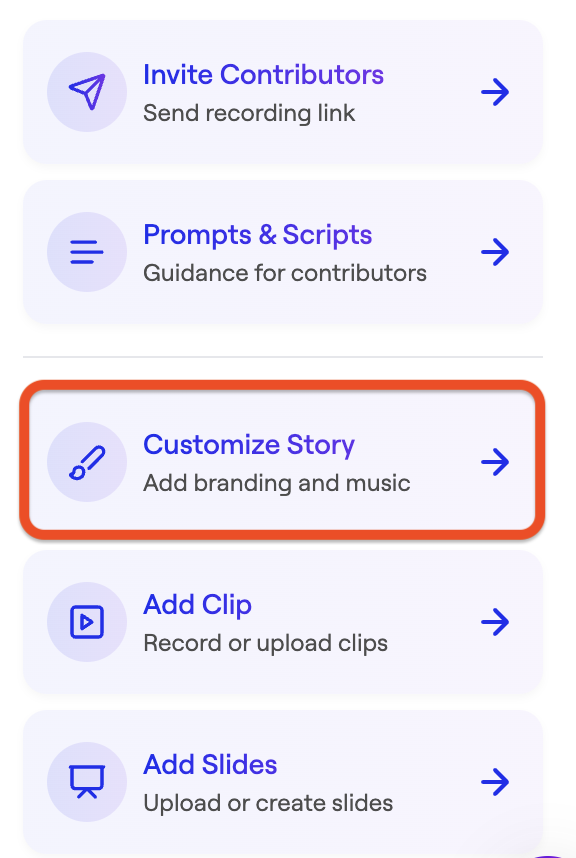
- Click Customize Story in your story
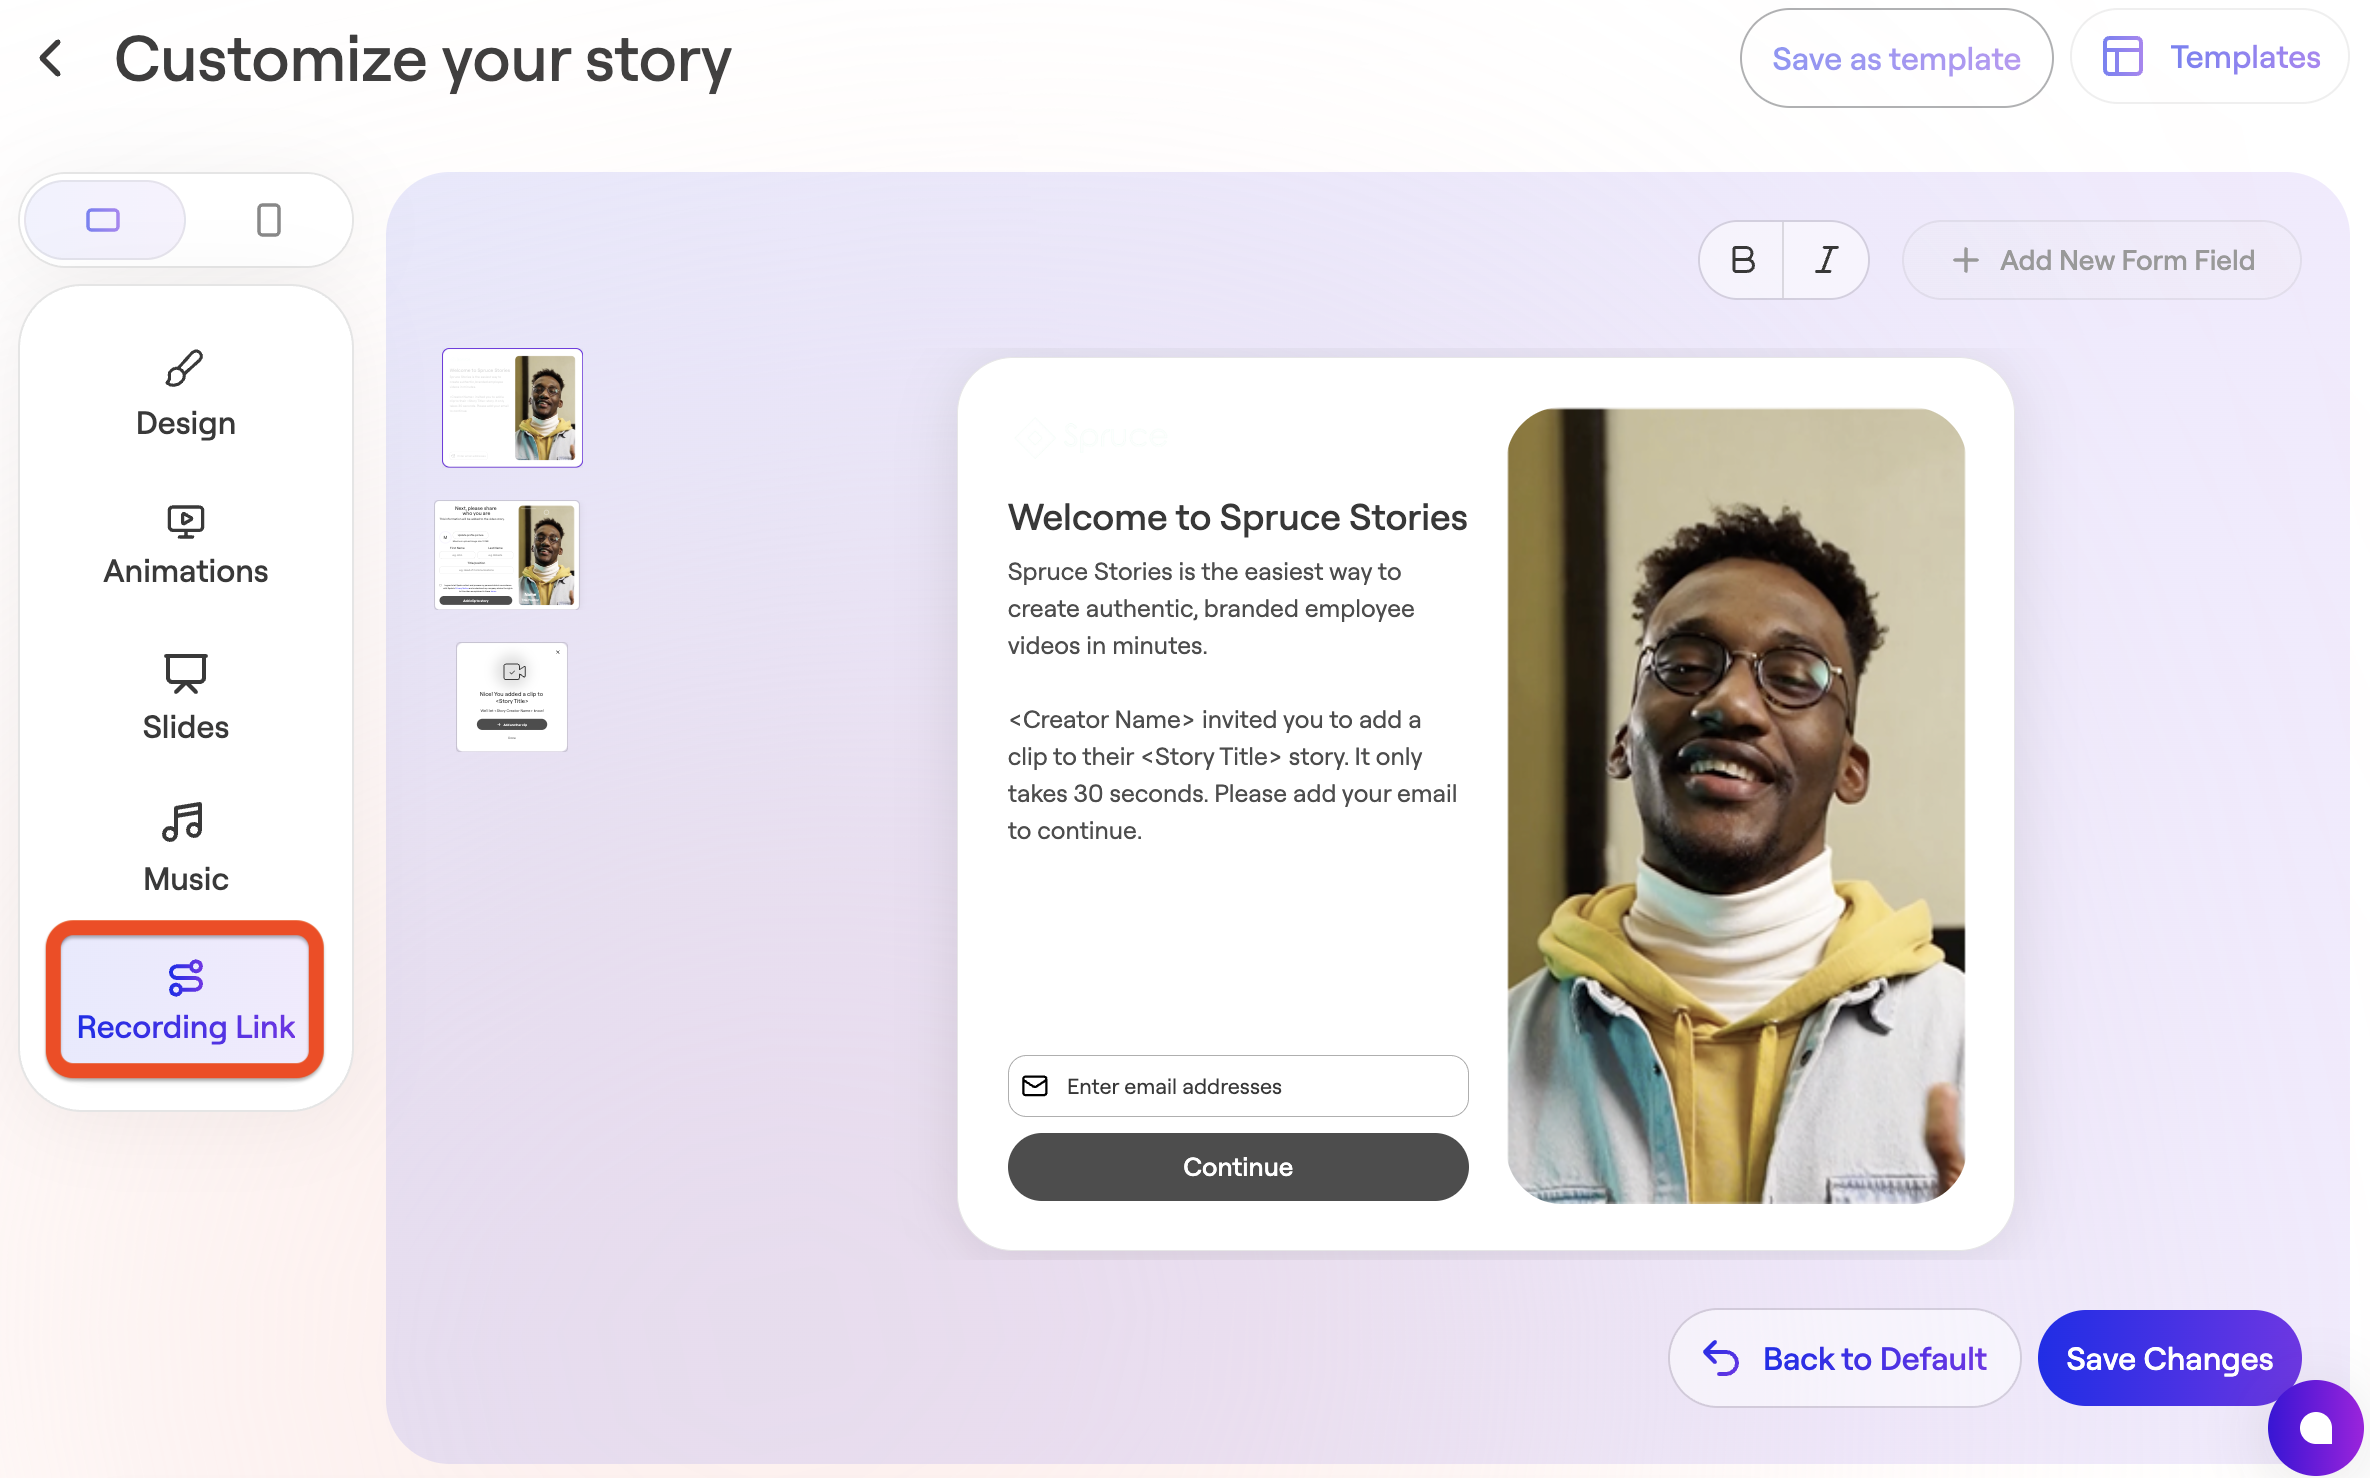
- Click Recording Link
- Make your edits
- Click Save Changes
Why it matters
- Build trust: Familiar branding helps people feel more comfortable when opening a recording link
- External use: Works well for customer testimonials, partner content, and outreach
- Targeted campaigns: Customize messaging for specific audiences or projects
- Stay consistent: Keep the experience aligned with your brand across all videos