

Recording a Vertical Video from Your Desktop
Last updated July 21, 2026
Overview
If someone sends you a Spokn recording link, they’re inviting you to contribute a short clip to a video story. You do not need to download an app or create an account to record. It takes just a few minutes and you can do it from your desktop or mobile.
This guide walks you through what to expect and how to record your clip.
Step 1: Open the Recording Link
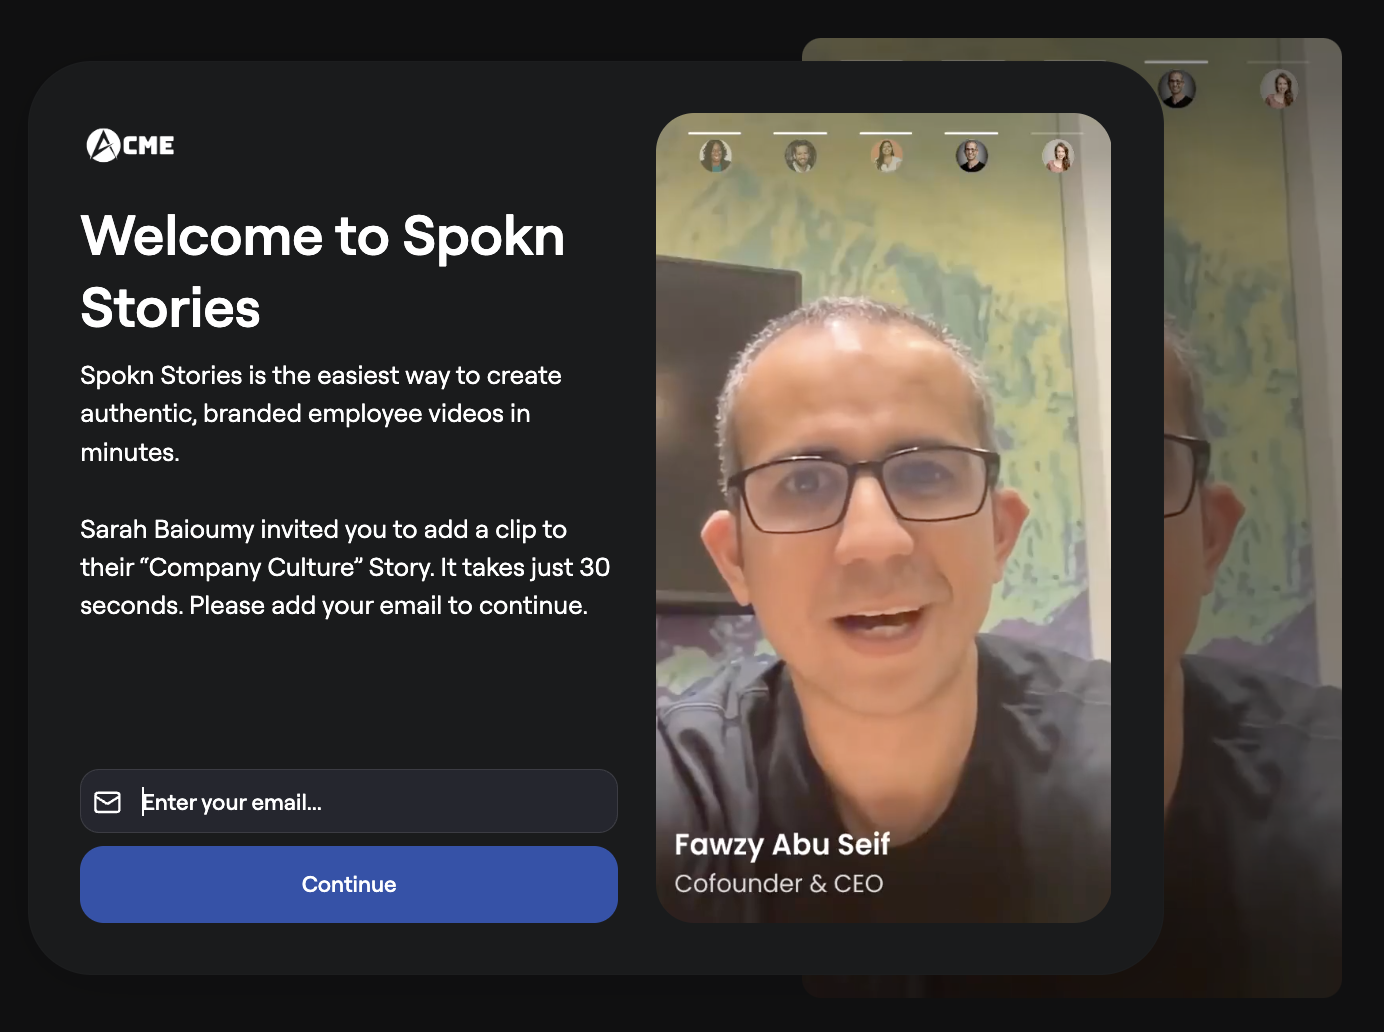
Click the recording link you received.
Enter your work email and click Continue.
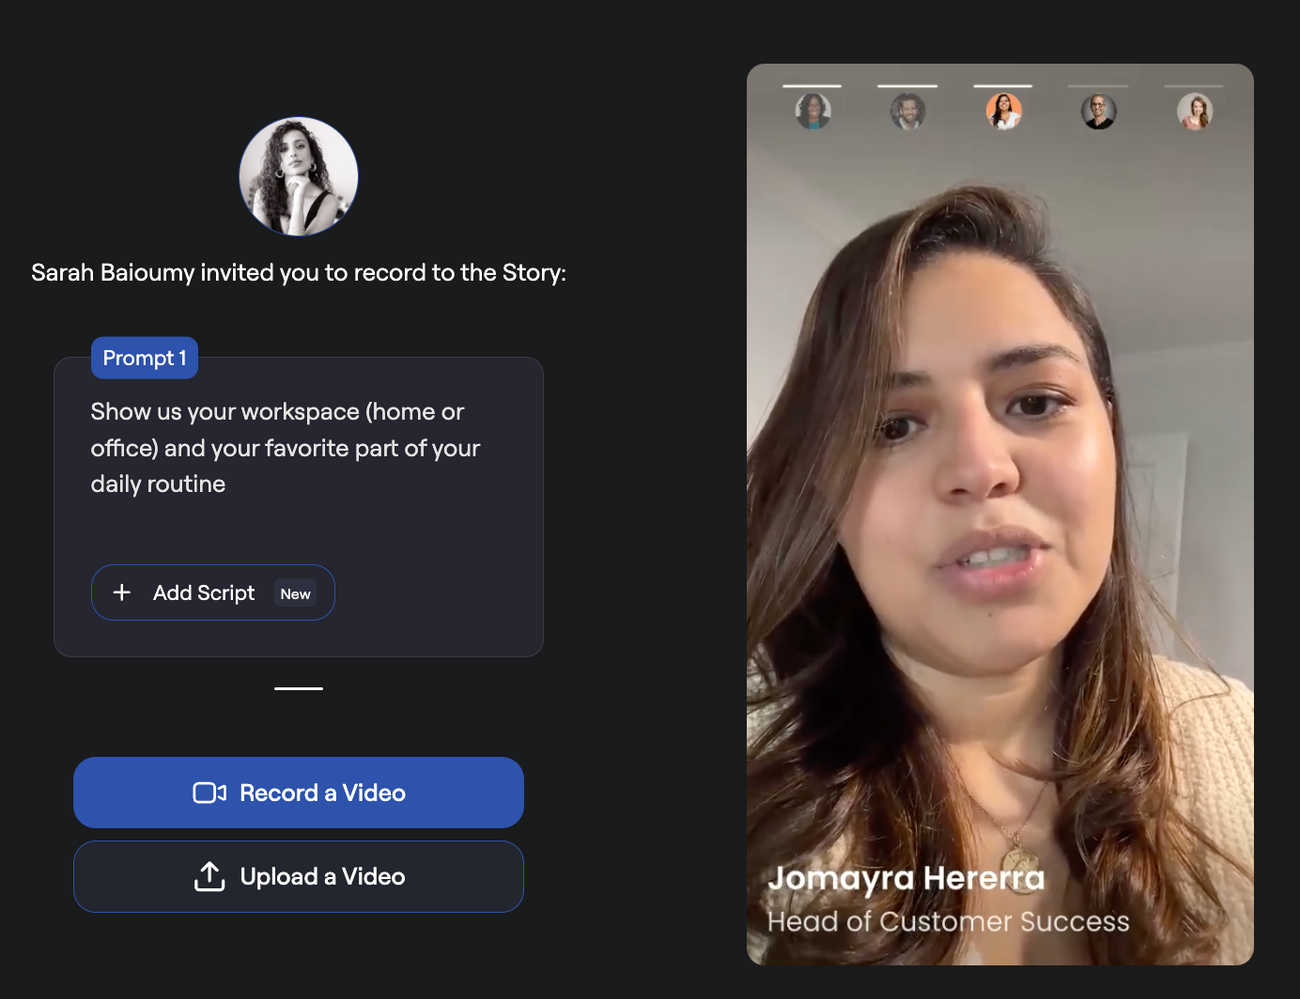
You can also choose to Upload a Video if you already have a clip you wish to upload instead.
Step 2: Choose Your Camera and Microphone
The first time you record, you will see a popup prompting you to allow Spokn to use your camera and microphone. Follow the directions in this article for help.
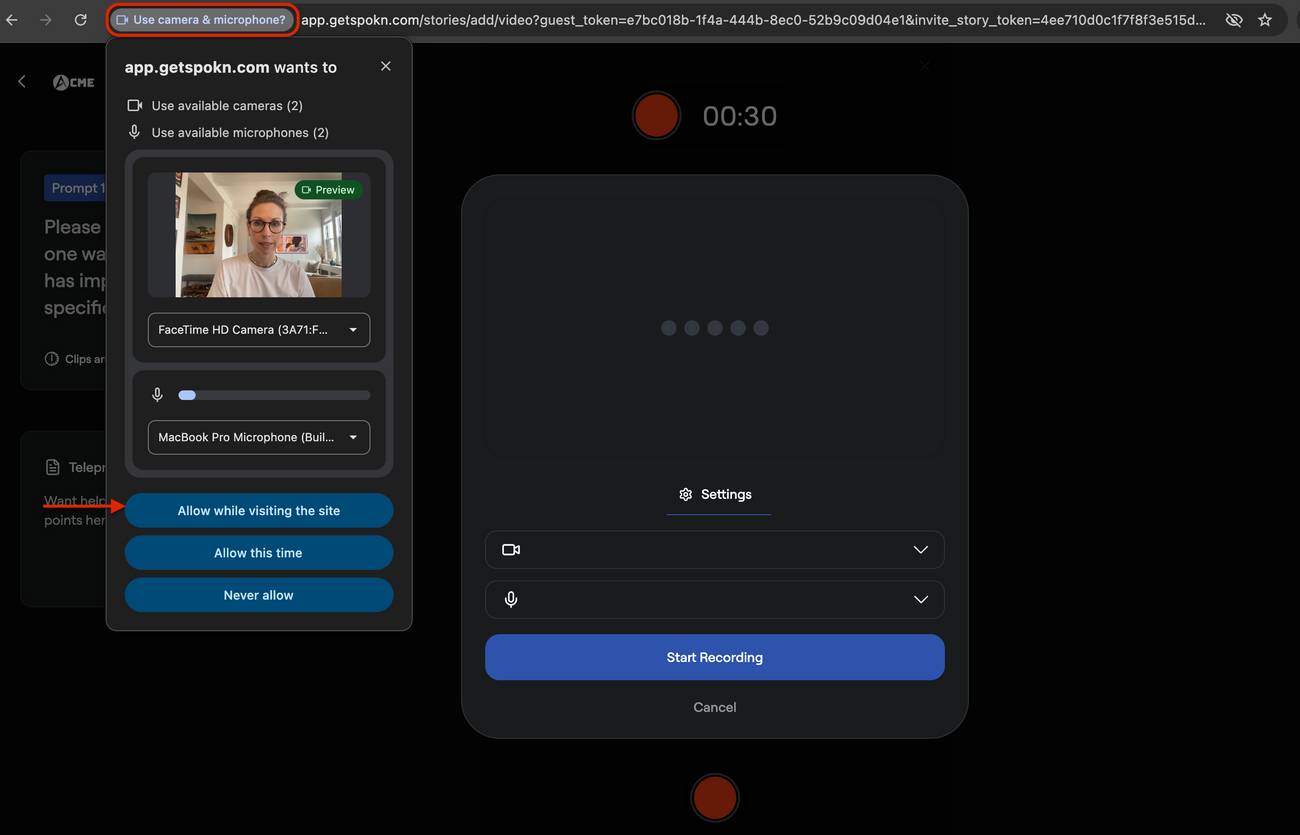
Before recording, you can:
- Select your camera
- Select your microphone
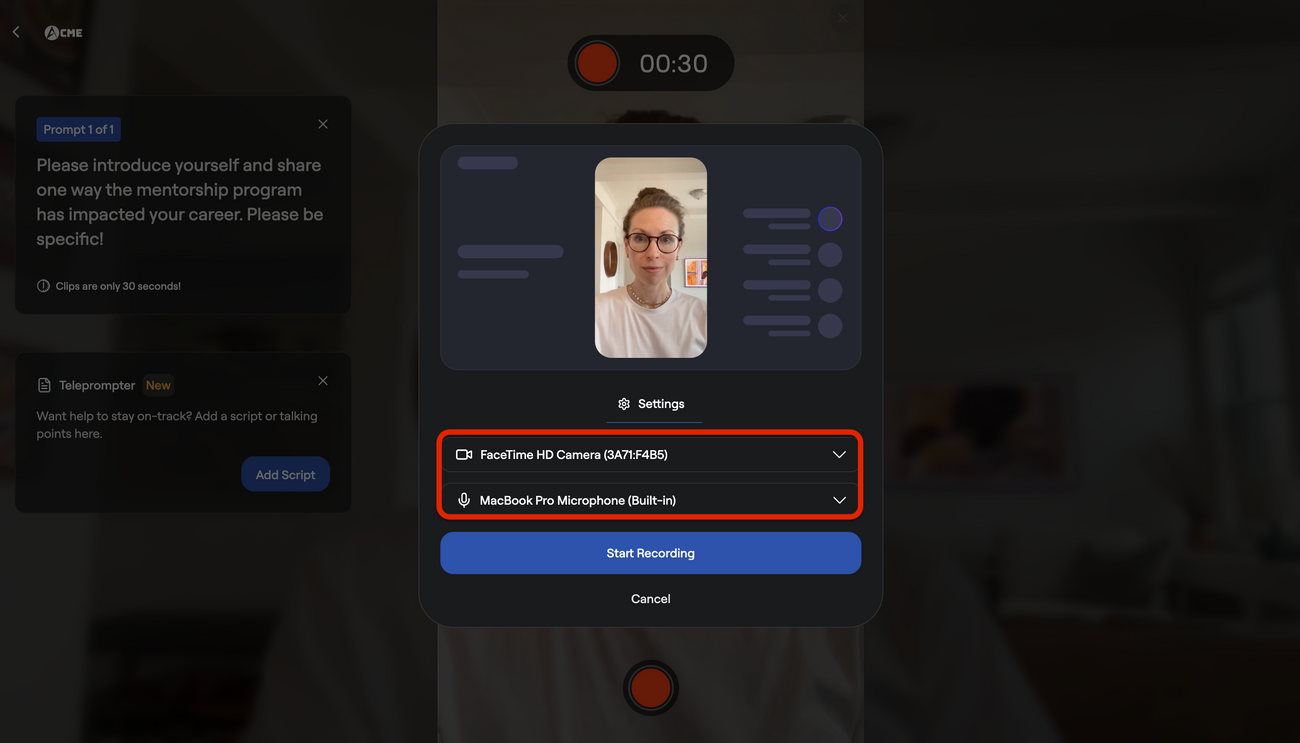
If you are using a laptop with built-in camera and mic, the default settings usually work well.
Click Start Recording when you’re ready.
Step 3: Record Your Video
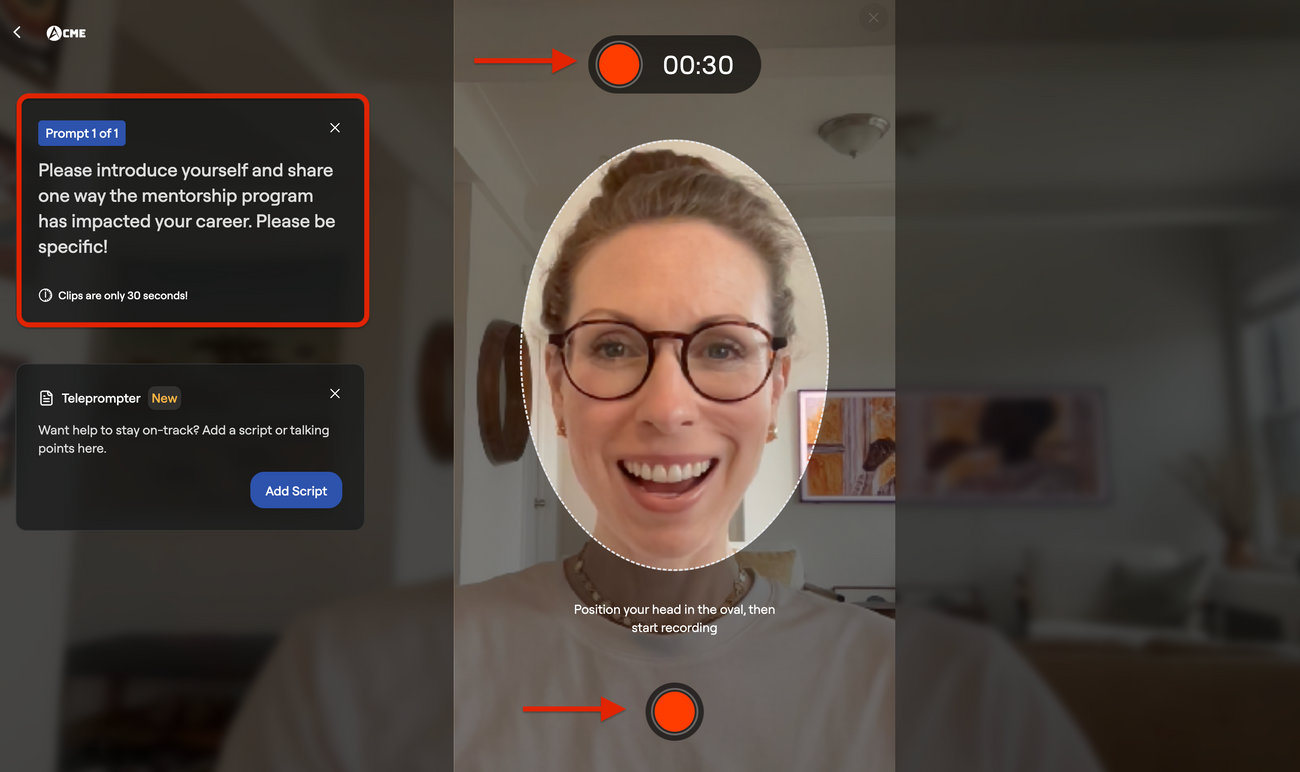
You’ll see:
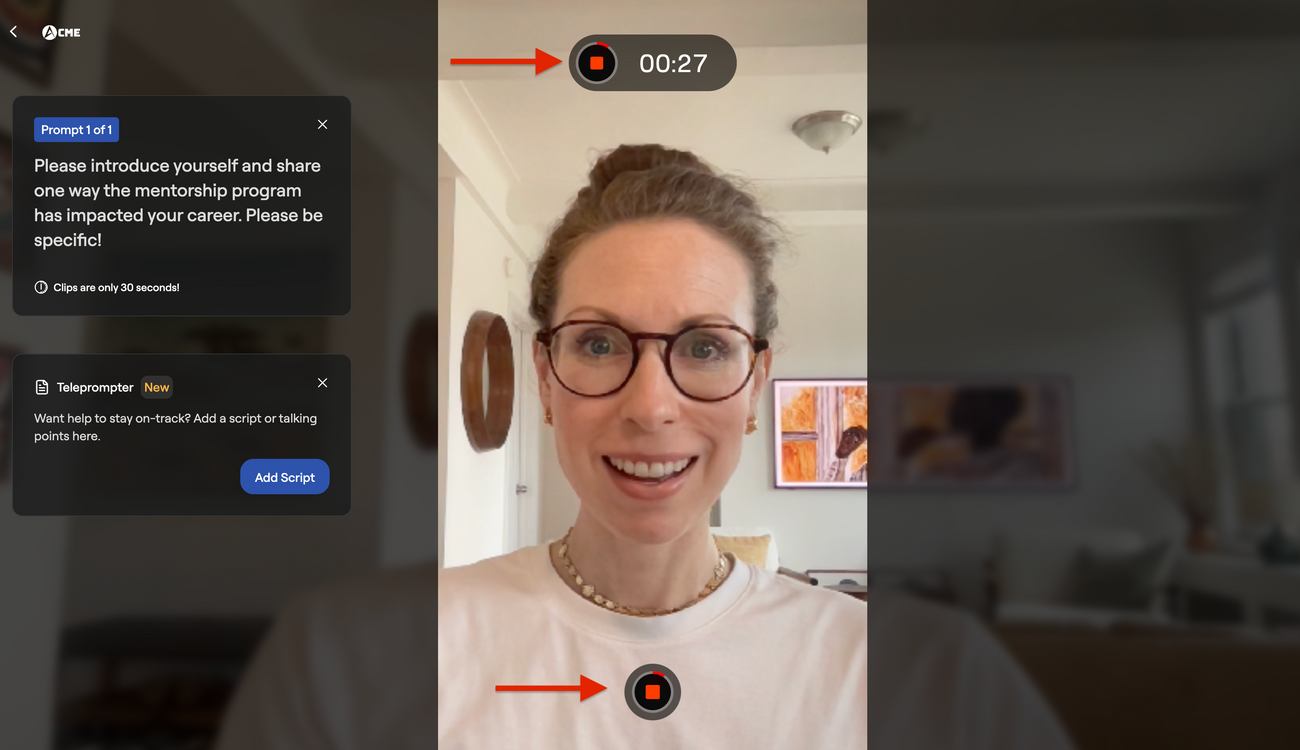
- A red start/stop button
- A countdown clock with your time limit per clip
- The prompt you're asked to respond to
- A guide showing where to position your face
- An optional teleprompter which may include a pre-assigned script
Tips:
- Look directly at the camera
- Keep your message concise
- Speak naturally
There is a time limit to help keep videos engaging. If time runs out, the recording will automatically stop.
Step 4: Use the Teleprompter (Optional)
If you’d like help staying on track, you can use the built-in teleprompter.
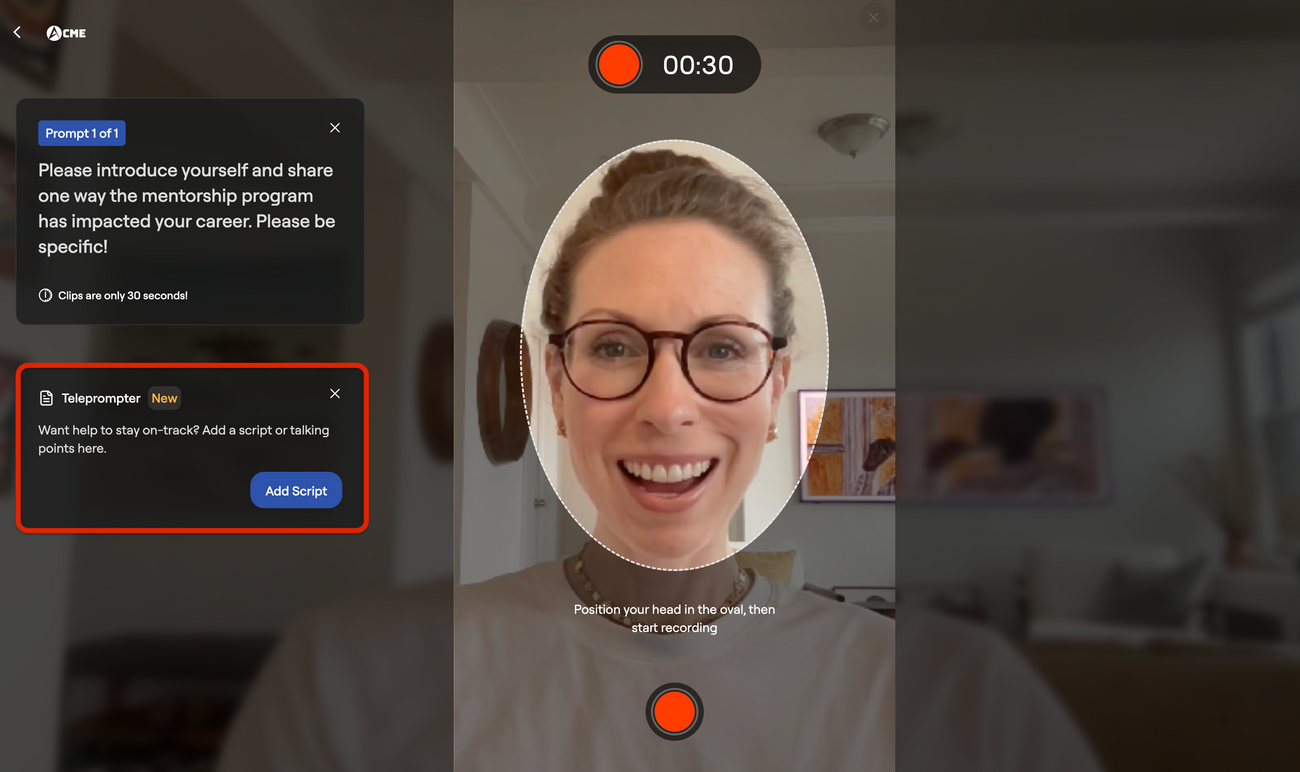
You can:
- Type notes or a full script
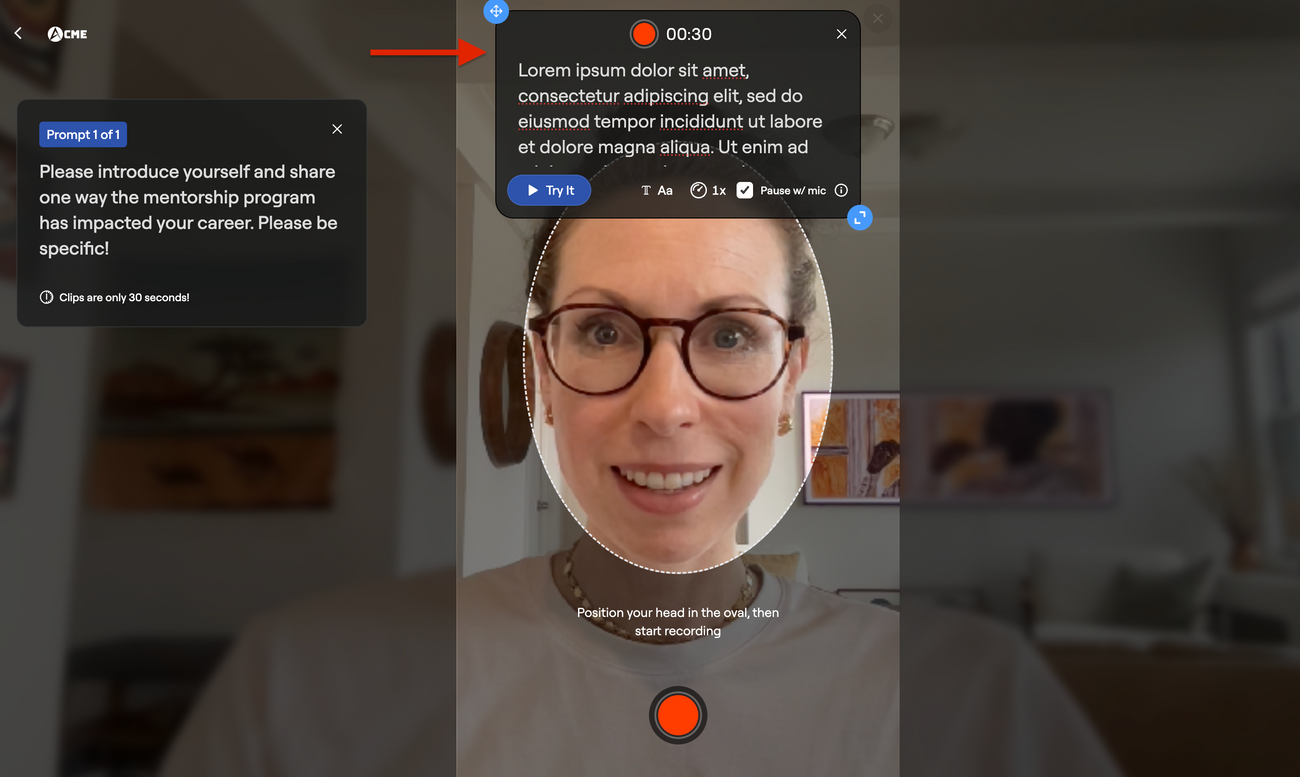
- Adjust teleprompter window size
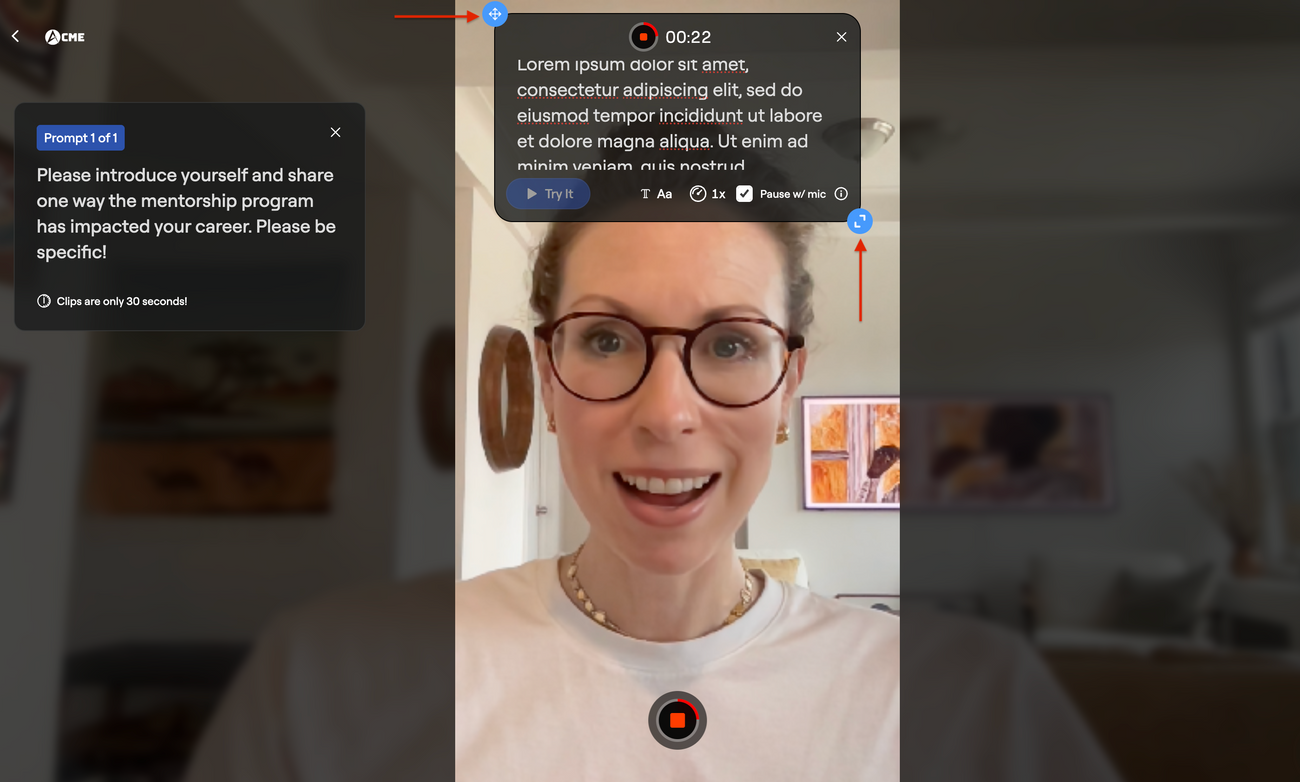
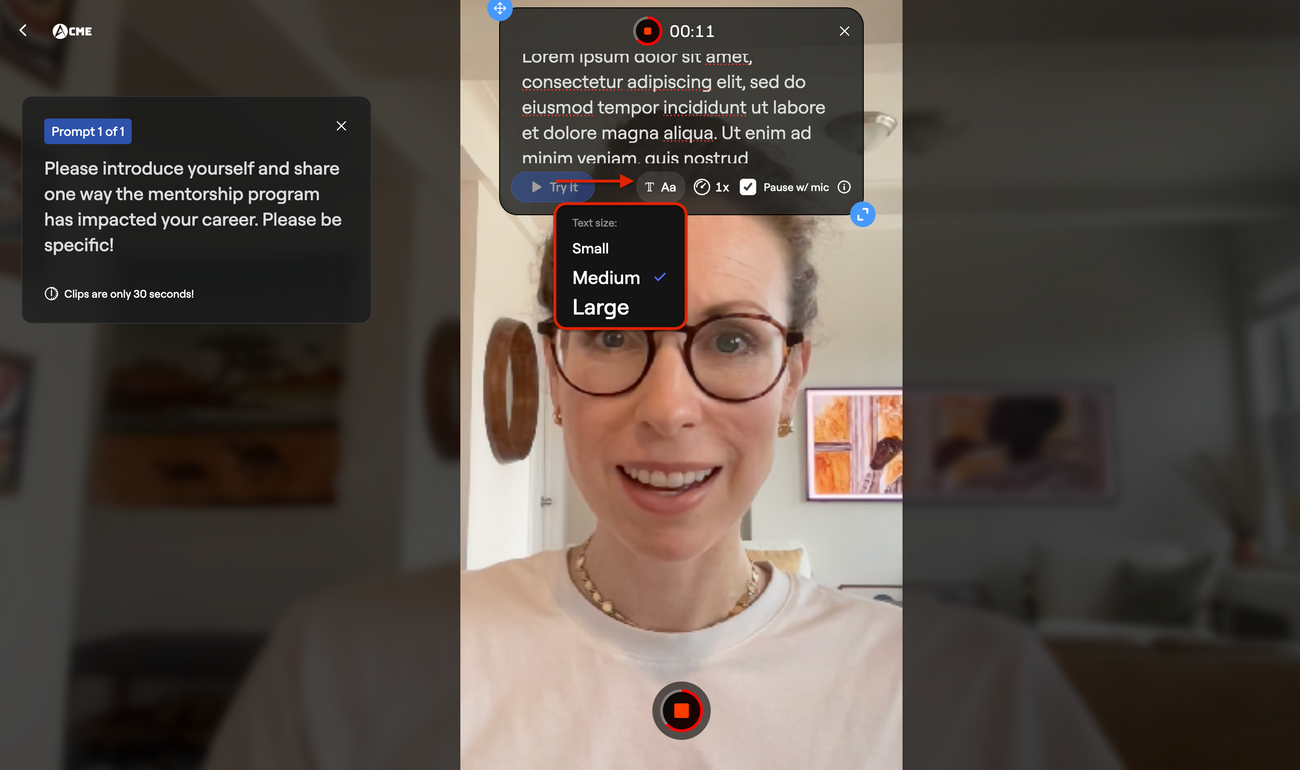
- Adjust font size
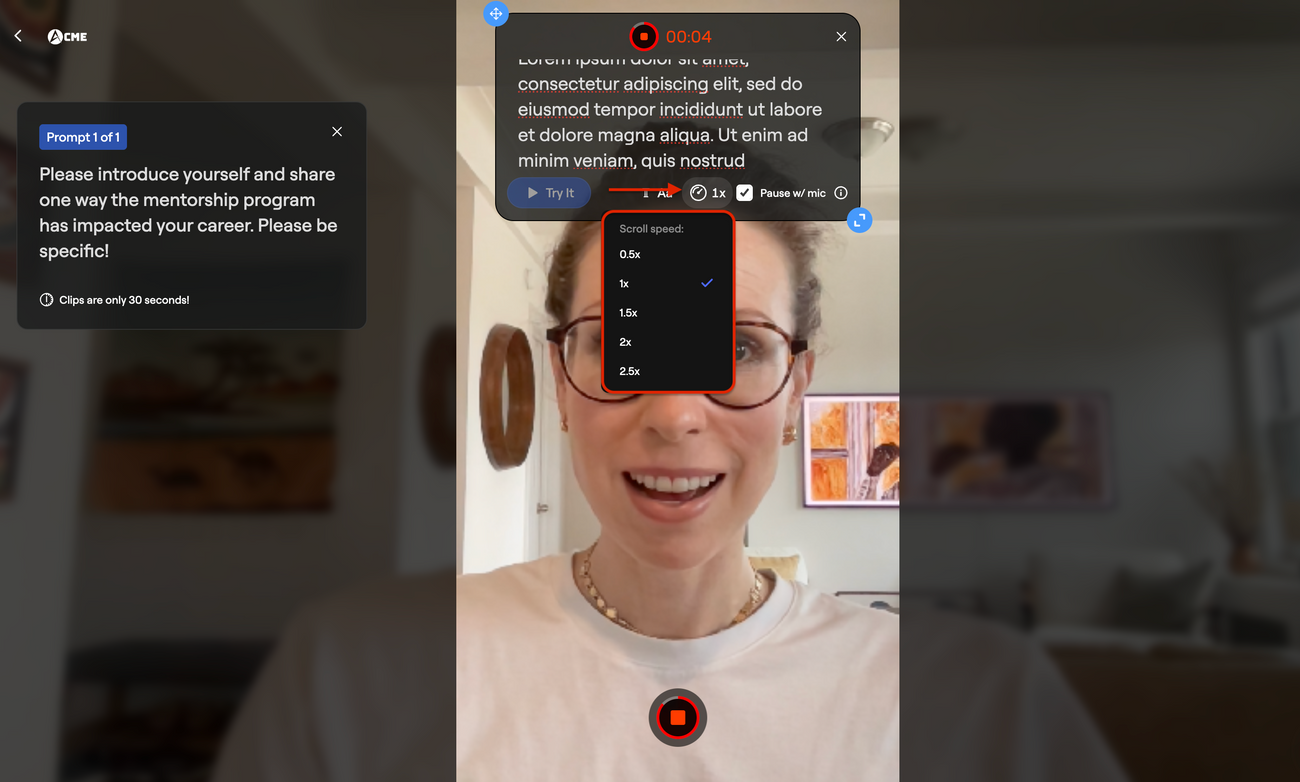
- Adjust scroll speed
- Pause the teleprompter with your mic so when you pause, it pauses. This helps you avoid being left behind.
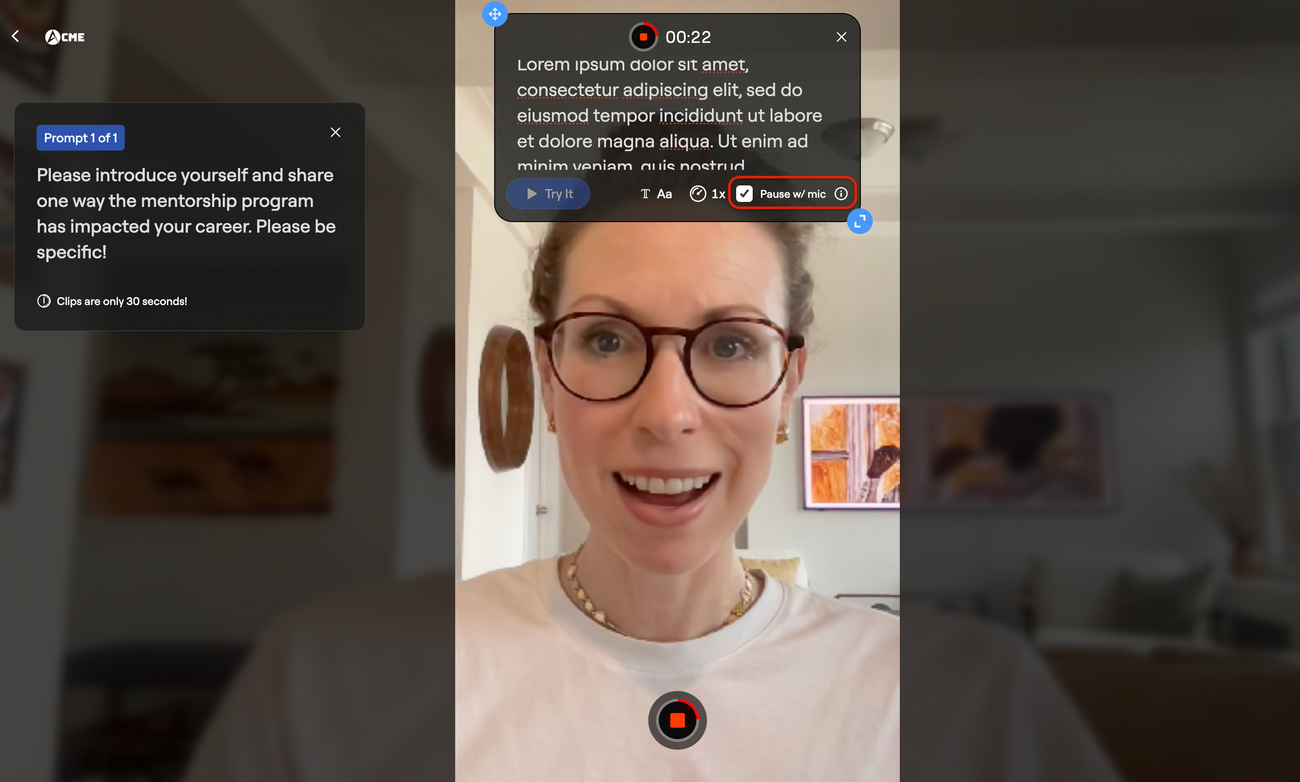
💡 If using this feature, remove any line breaks from your script before recording to ensure the teleprompter advances properly.
Step 5: Review and Edit
After recording, you can:
- Replay your clip
- Re-record as many times as you would like
- Trim the beginning or end
- Add a screenshot or image (if relevant)
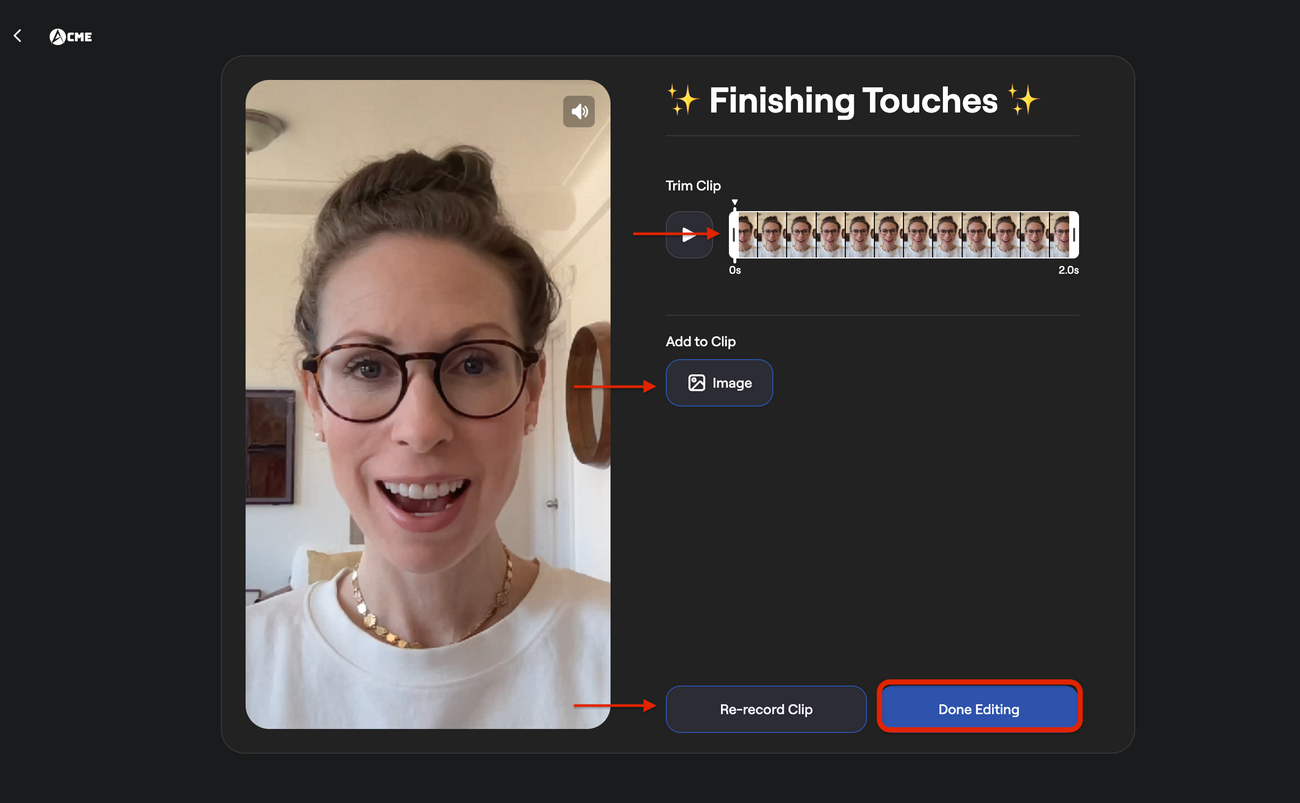
If you’re happy with your clip, click Done Editing.
Step 6: Add Your Details and Submit
Before submitting, you’ll:
- Enter your name
- Enter your job title
- Agree to the video usage terms
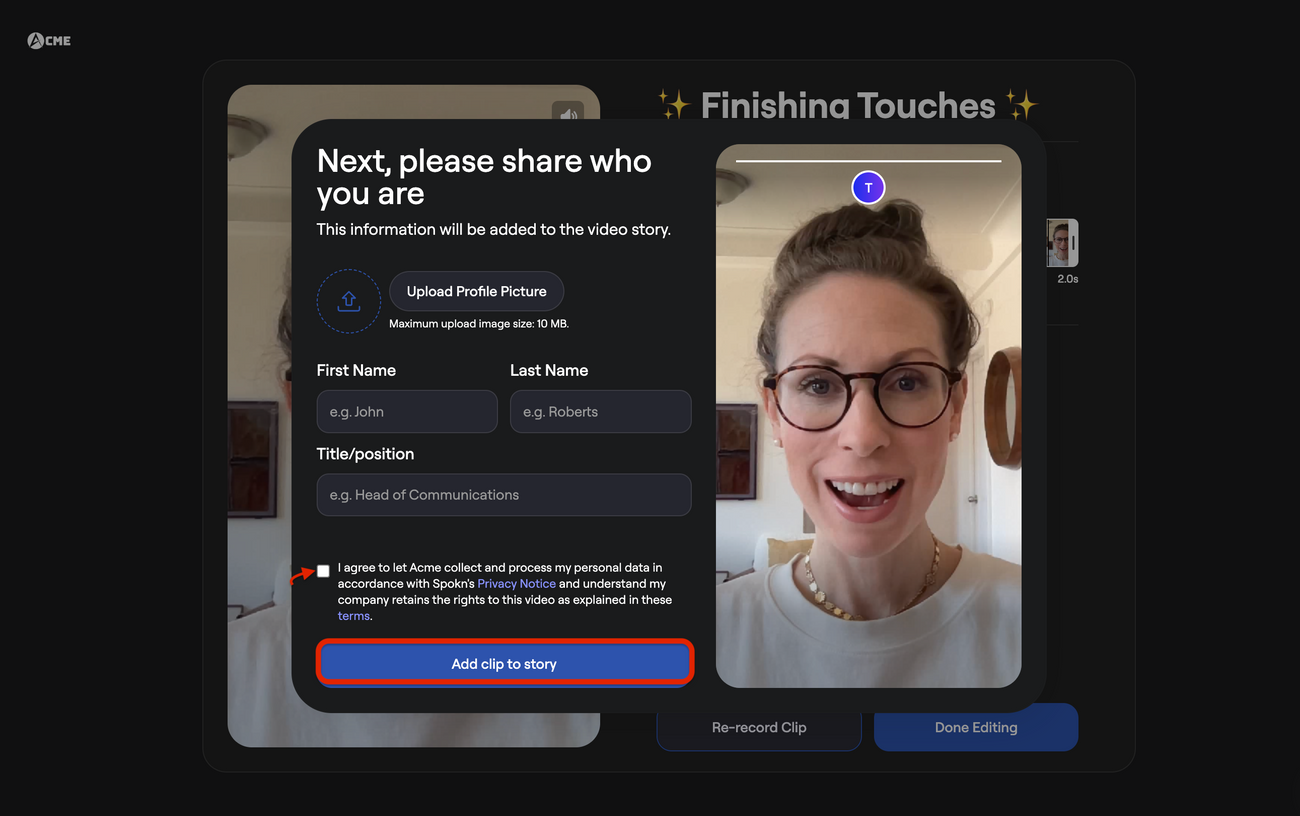
Click Add clip to story.
Once submitted, your clip is sent to the story editor for review.
Note: Depending on your network speed and video length, upload may take a few minutes. You’ll see a confirmation message once your clip has been successfully added.