

MS Azure SSO
Last updated July 21, 2026
Before completing SSO, please review the ‘Common Issues with MS SSO’ section at the bottom of this page first.
Configuring Azure SSO
- Login to the Azure portal https://portal.azure.com to add the Connections application to Azure
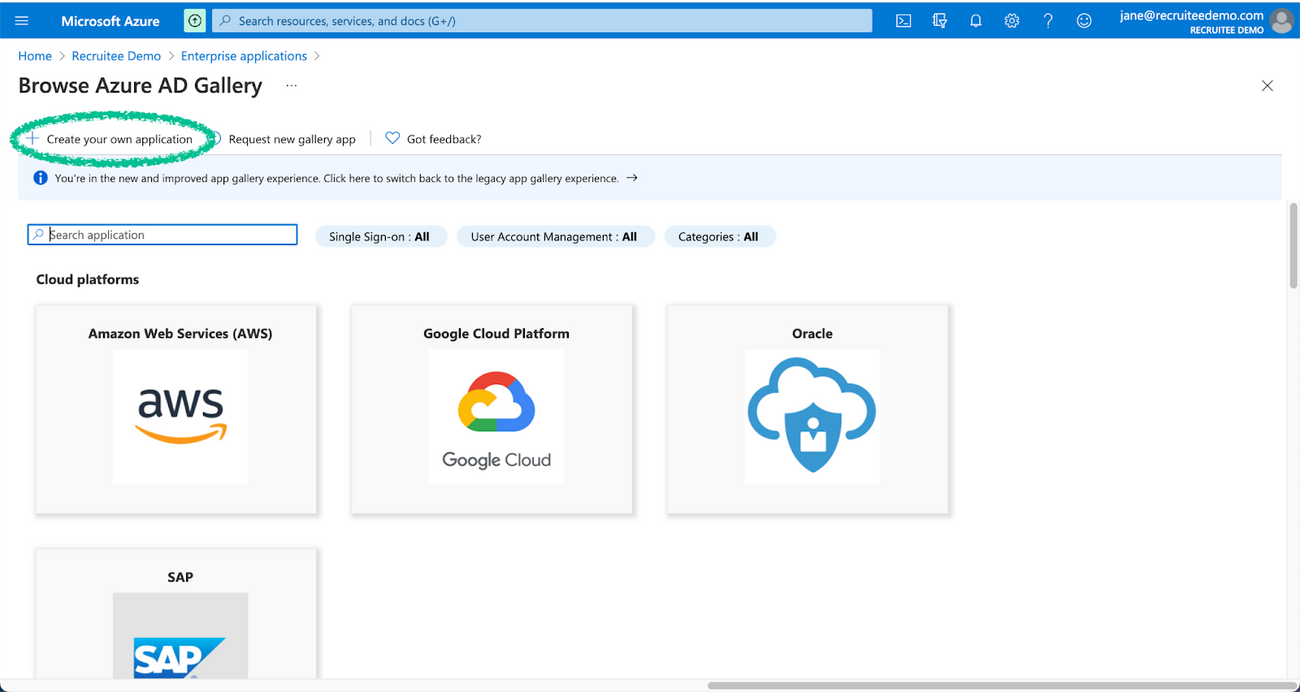
- Under Manage, click Enterprise Applications and then click Create your own application.
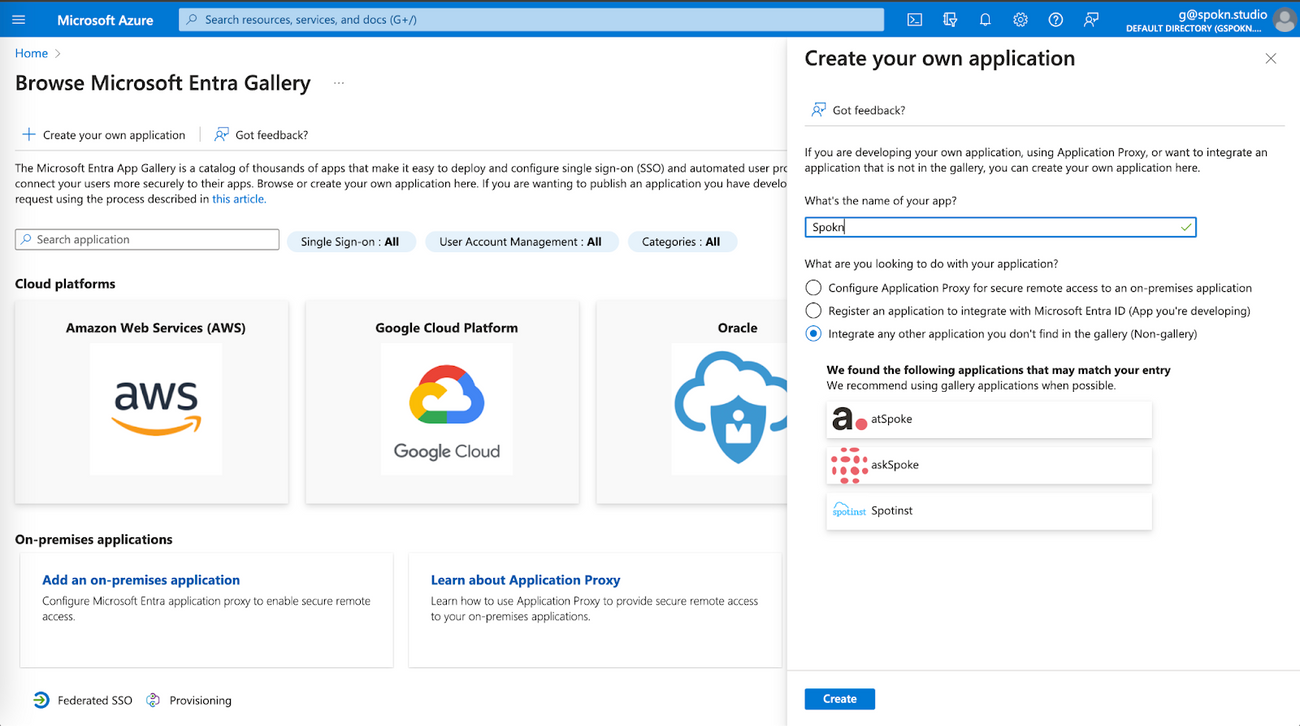
- Provide the following details for the application you are registering:
- Name: Spokn
- What are you looking to do with your application? Integrate any other application you don't find in the gallery (Non-gallery)
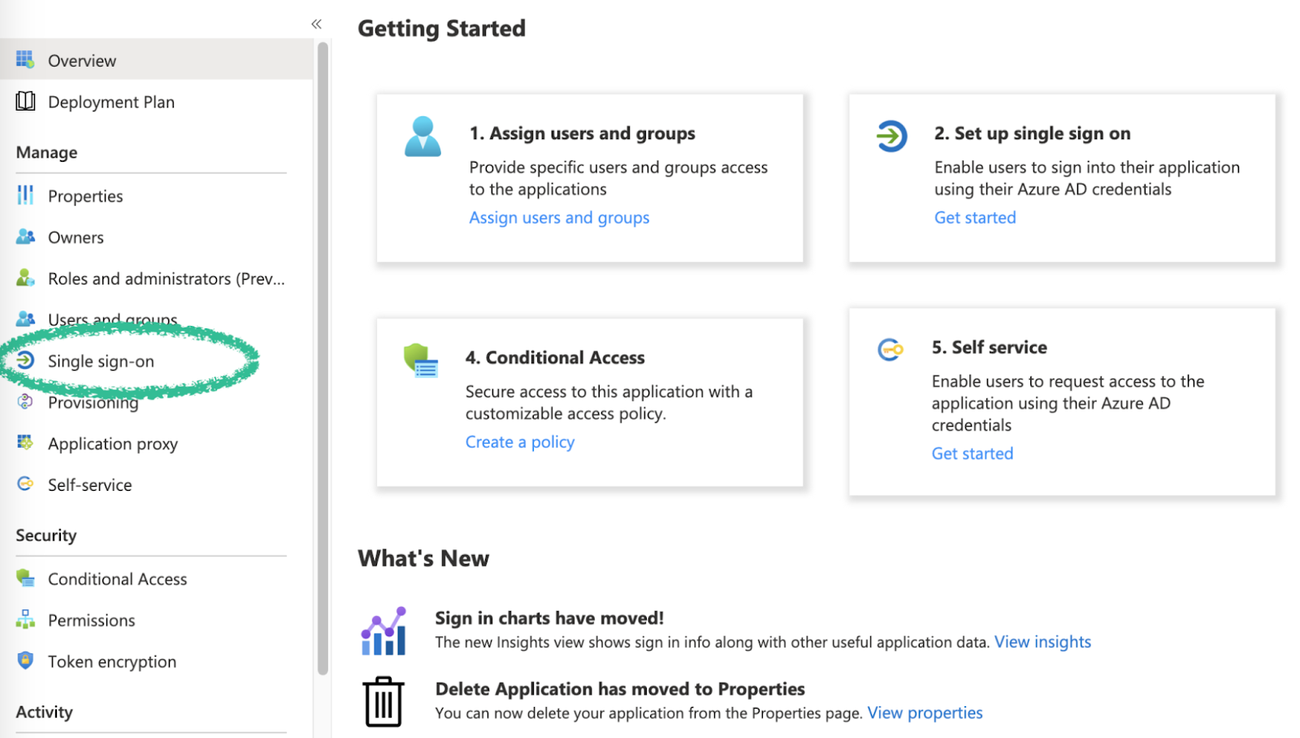
- You will be redirected to the newly-created application Overview. Go to Getting started via the left-side menu and click Configure single sign-on (or click Single sign-on from the side menu).
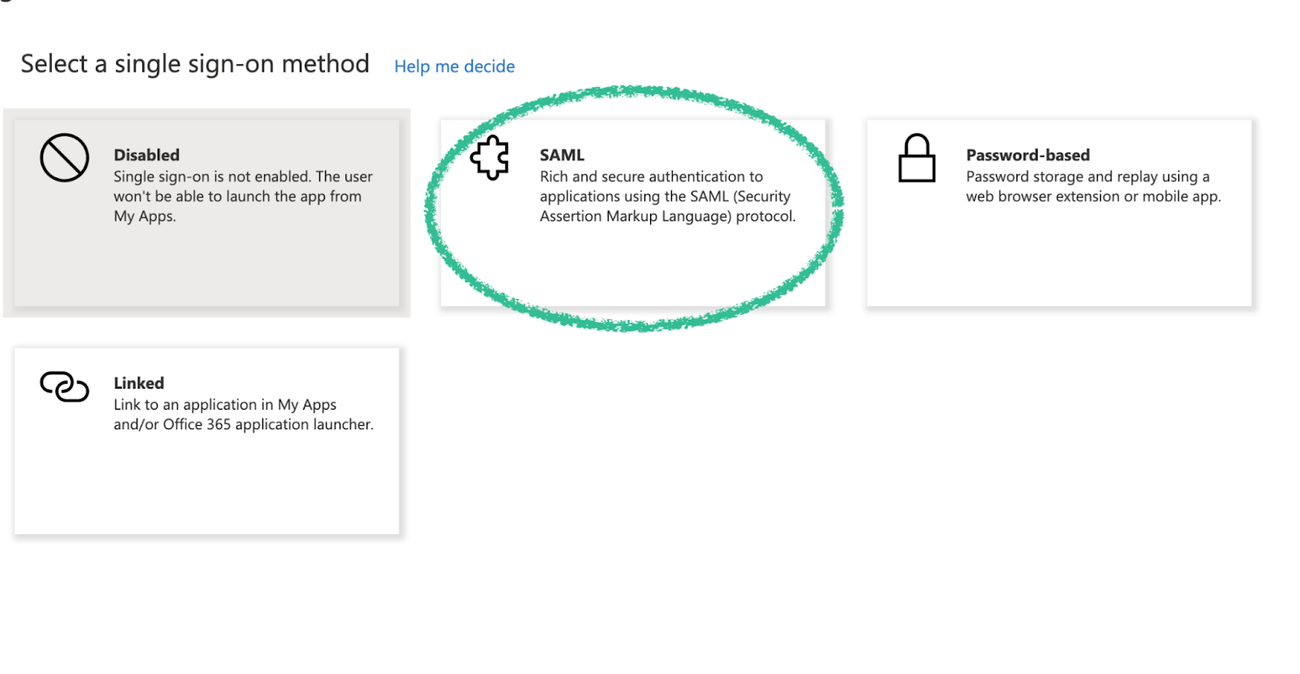
- Select SAML as the single sign-on method.
- Click on the pencil icon to Edit step 1, the Basic SAML Configuration.
- Add the following values and save:
- Identifier (Entity ID): SPOKN_SSO
- Reply URL:
- https://api.spokn.app/users/sso-web/callback https://app.getspokn.com
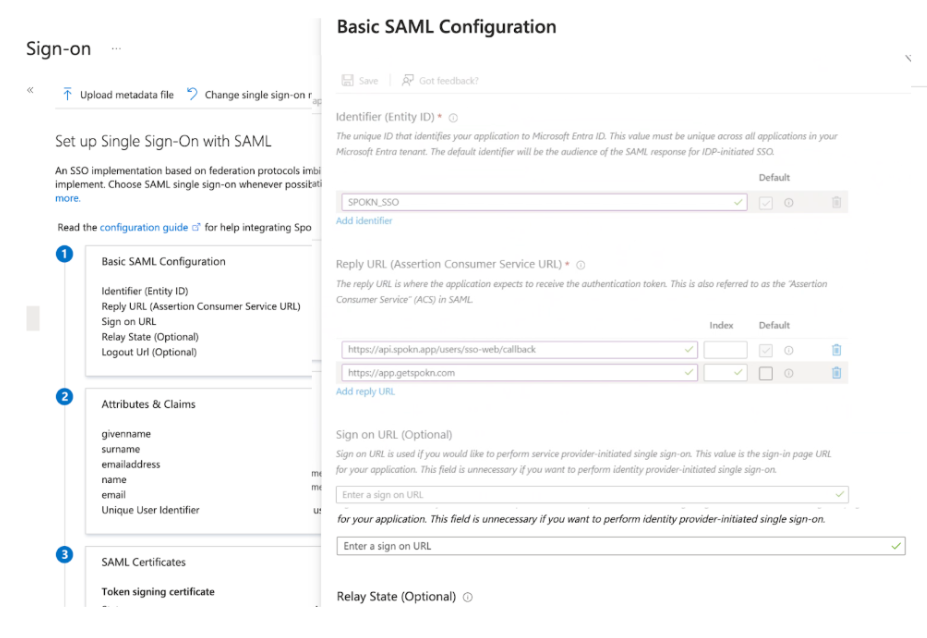
- On Attributes & Claims section
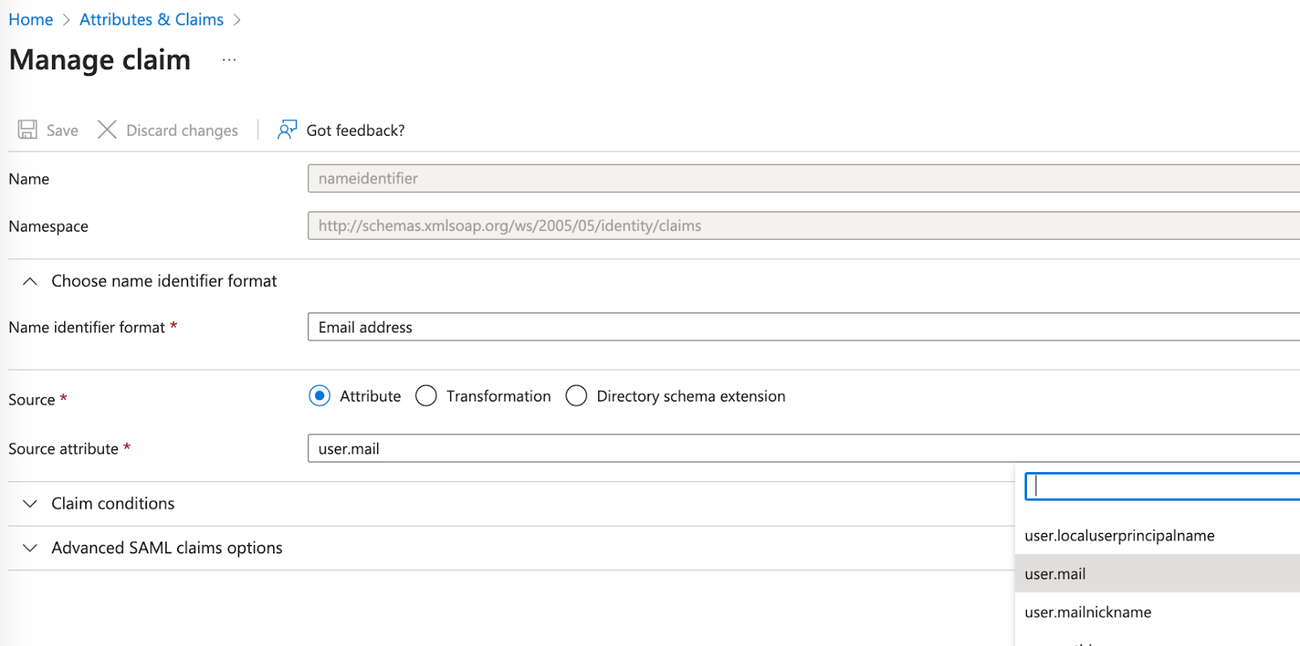
- Make sure to change the Required Claim (Name ID) to the following (user.mail)
- Make sure to add these additional claims to the app
- email : user.mail
- emailaddress : user.mail
- first_name : user.givenname
- last_name : user.surname
- name : user.userprincipalname
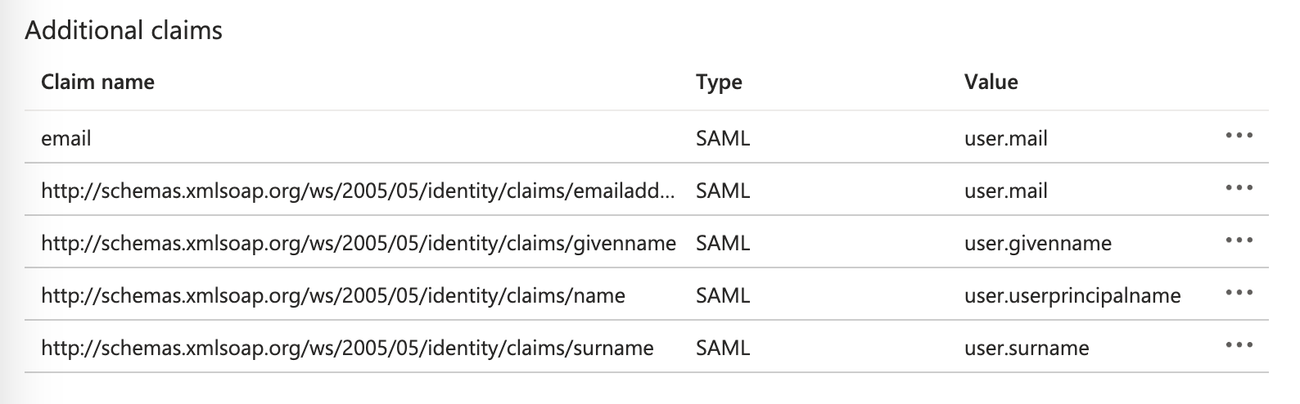
- Click Save. Users registering in your SSO-enabled company will have these fields pre-filled in the registration form.
- Scroll down and click on the pencil icon to Edit the SAML Signing Certificate. Change the Signing Option to Sign SAML response. Save, and close the form.
- Configurations look as follows:
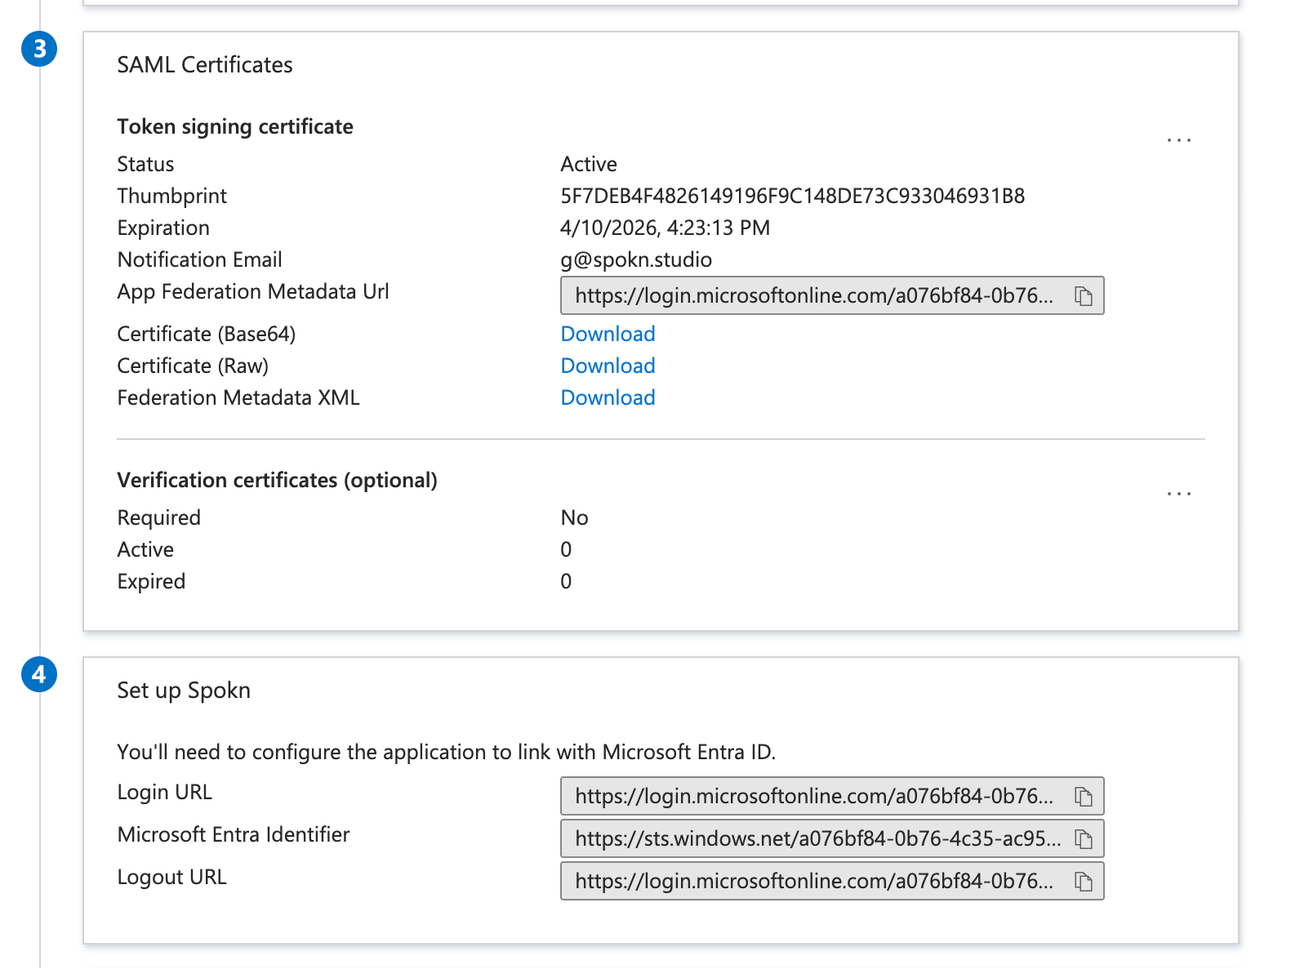
- Test that all is working well by selecting Test:
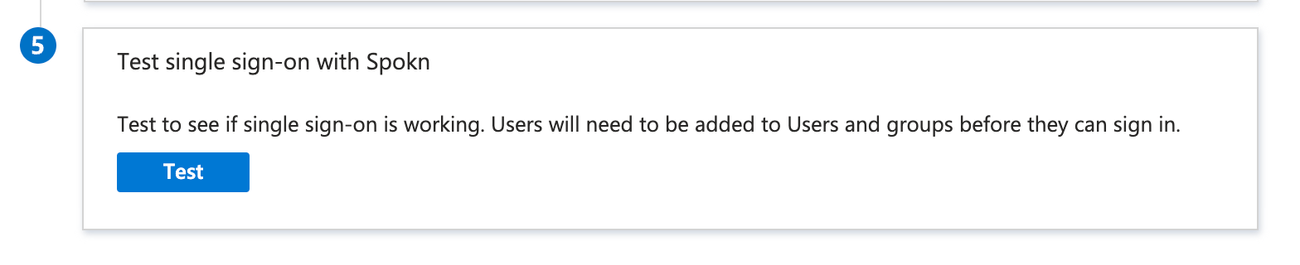
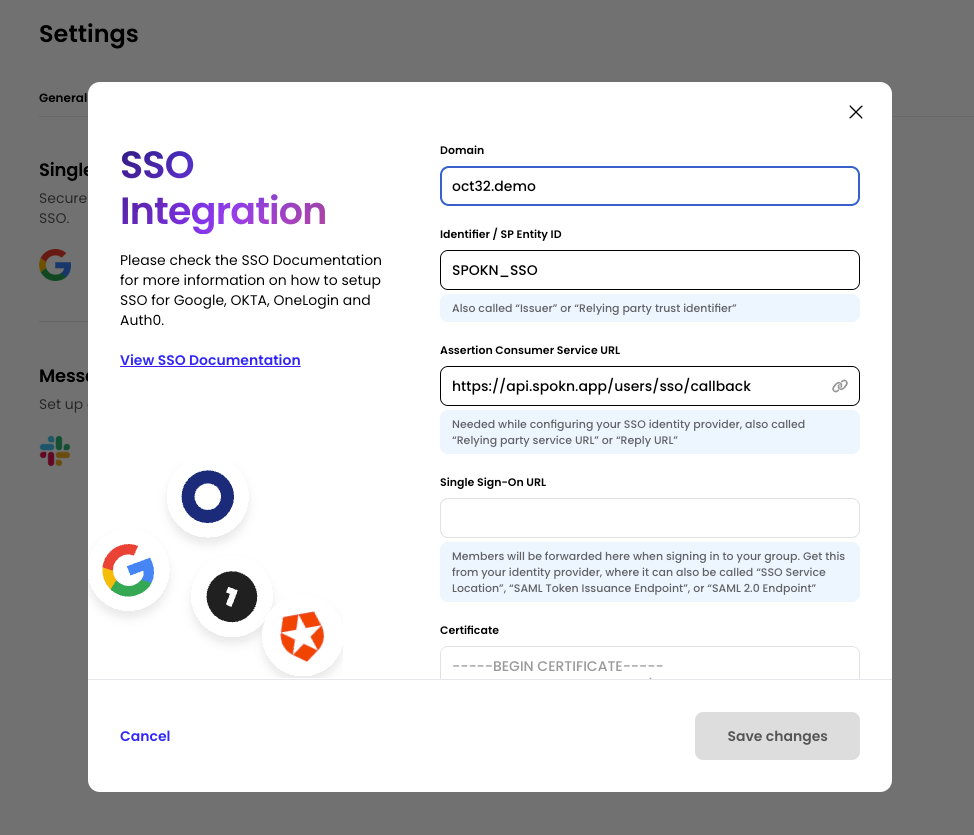
- Finally, set the configuration on Spokn’s dashboard. You will find all of Spokn’s metadata in the general tab in your Spokn portal. Click on Spokn -> Settings -> Integrations -> SSO to fill out the fields as follows:
- Set your company’s domain
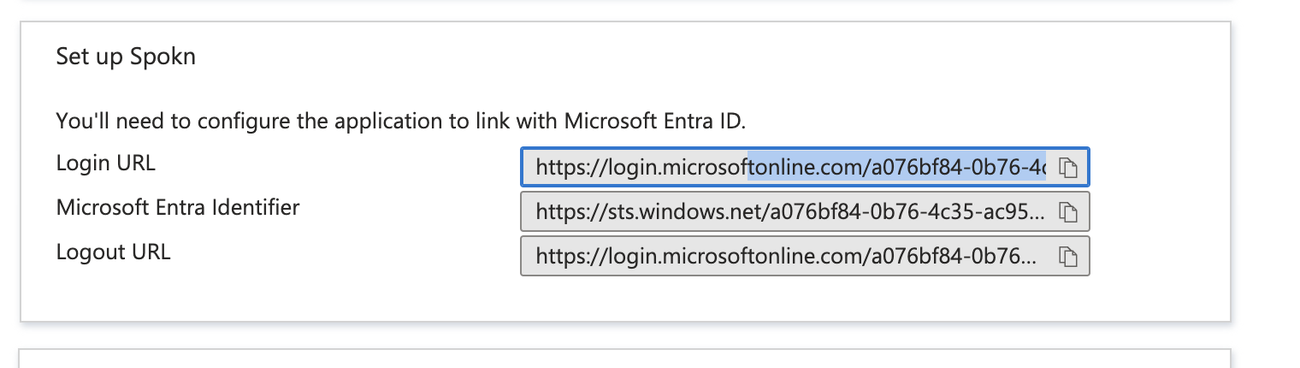
- Entry point is the “Embed Link” in Spokn’s app on Azure
- Reply-url should be the single sign on URL
- You will find the certificate when you try to edit SAML settings
- Update the audience restriction
Common Issues with MS SSO Setup
While setting up MS Azure, in some cases, users may face the following issues. These arise due to multiple installations of the SSO app.
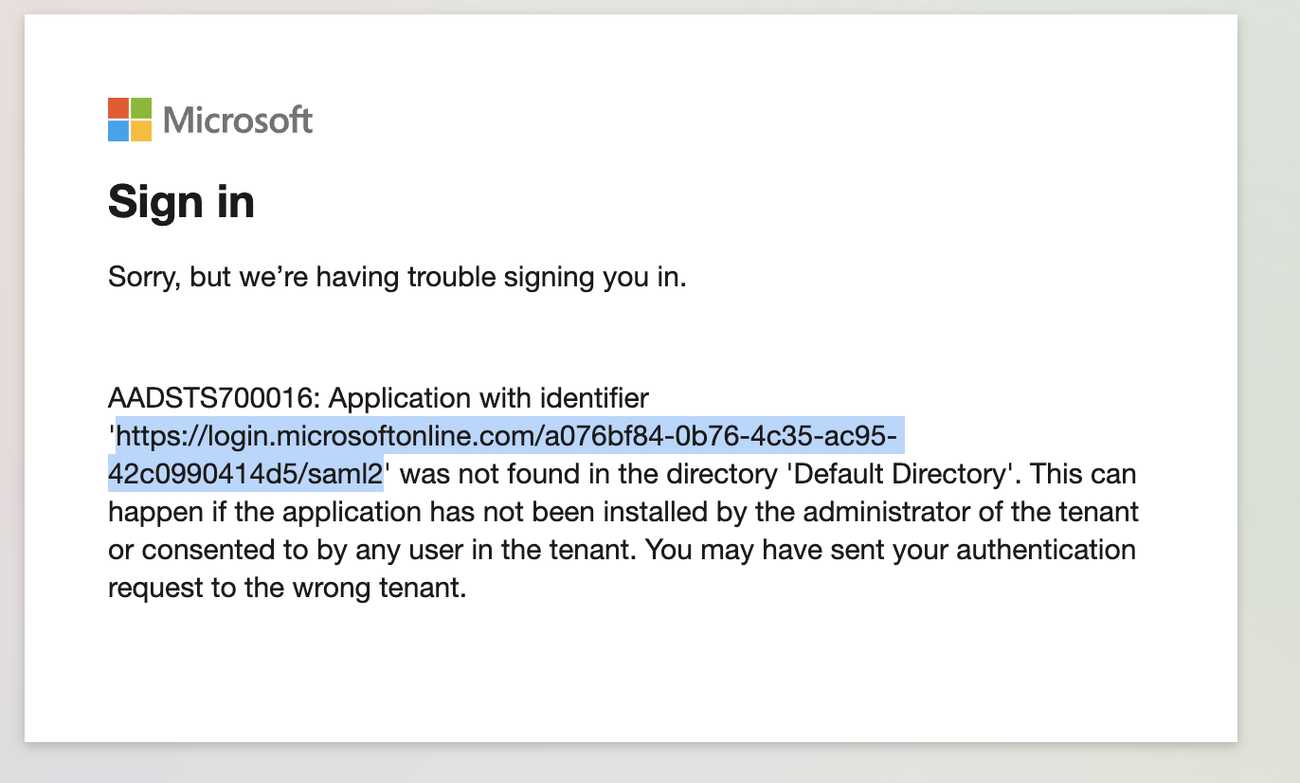
To address this issue:
- Please go to Enterprise applications -> Spokn App -> Single Sign-On
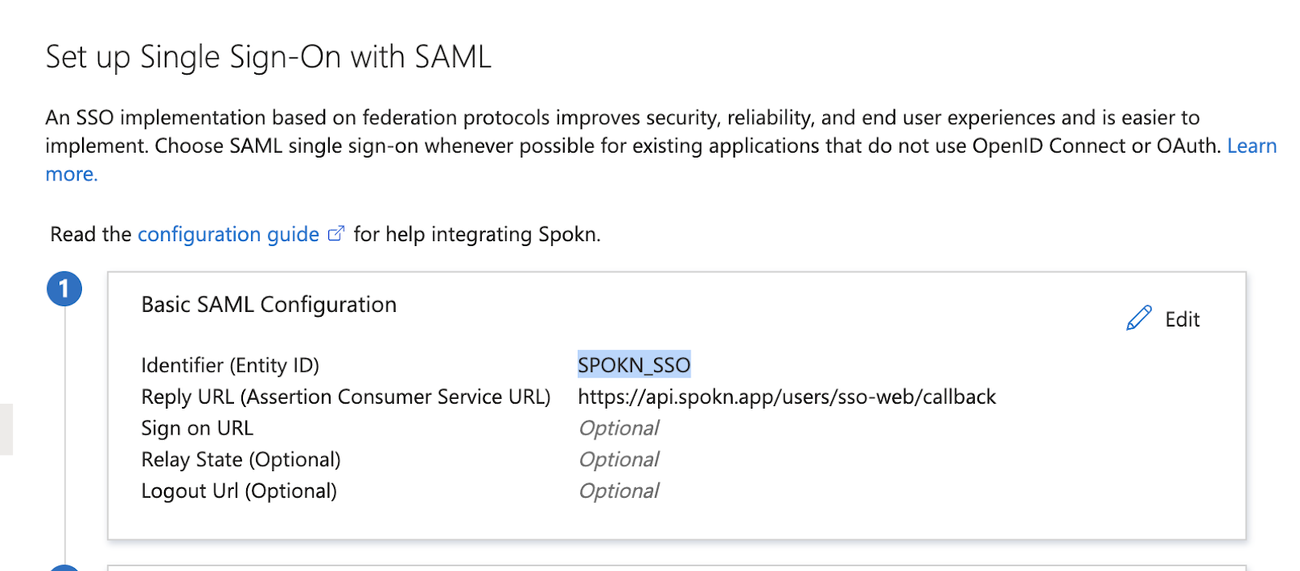
- On Basic SAML Configuration please hit edit (Screenshot 1)
- Take the identifier that is appeared on the error page when you tried to login to Spokn, it should be something like “https://login.microsoftonline.com/a076bf84-4c35-ac955/saml2” (Screenshot 2)
- Change SPOKN_SSO to this identifier.
- Hit Save The issue happened when an admin logged in to “Login using Microsoft account” and consented to make this app is the default, this override the identifier for Spokn app and the admin needs to change the identifier to be similar to
Configuring Spokn (Final Step)
Please complete the following configuration to add SSO information to your company’s Spokn Account.
To update the portal with your SSO data:
- Visit the Spokn portal here: Setting SSO
- In “Integration” Tab, Select “Connect” in the “Single Sign On” Section
- In the Domain field, set your domain (ex. getspokn.com)
- Copy the Identifier / SP Entity ID (SPOKN_SSO) to yours SSO SP identifier (Also called: Audience Restriction/sp Entity ID)
- Copy Assertion Consumer service URL ( https://api.spokn.app/users/sso-web/callback ) to your Reply URL (Also called: SAML Callback URL or relying party URL)
- In Single sign-on URL, paste your SSO Entry URL (Also called: SSO service location or SSO Endpoint)
In Certificate, add the certificate from your IdP (no need to remove the begin/end part, it will be truncated automatically)
Was this article helpful?