
Google SSO
Last updated July 21, 2026
Security settings for Your Google SSO
- Navigate to your Google Admin console (admin.google.com)
- Go to Apps > Web and mobile apps .
- Click Add App -> Add private SAML app.
- On the App Details page, enter the name of the custom app.
- Click Continue.
- On the Google Identity Provider details page, get the setup information needed by the service provider using one of these options:
- Download the IDP metadata.
- Copy the SSO URL and Entity ID and download the Certificate (or SHA-256 fingerprint, if needed).
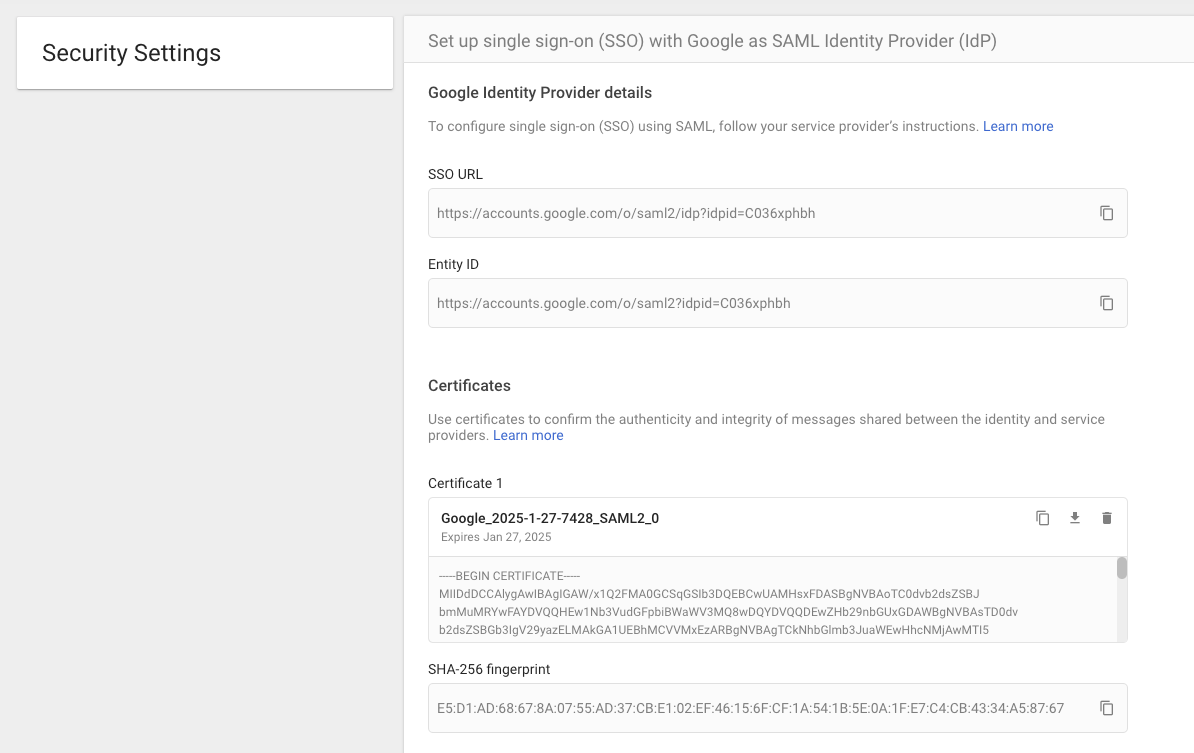
- (Optional) In a separate browser tab or window, sign in to your service provider and enter the information you copied in Step 6 into the appropriate SSO configuration page, then return to the Admin console.
- Click Continue.
In the Service Provider Details window, enter an ACS URL, Entity ID, and Start URL (if needed) for your custom app. These values are all provided by Spokn.
Note: The ACS URL has to start with https://
On Google Admin
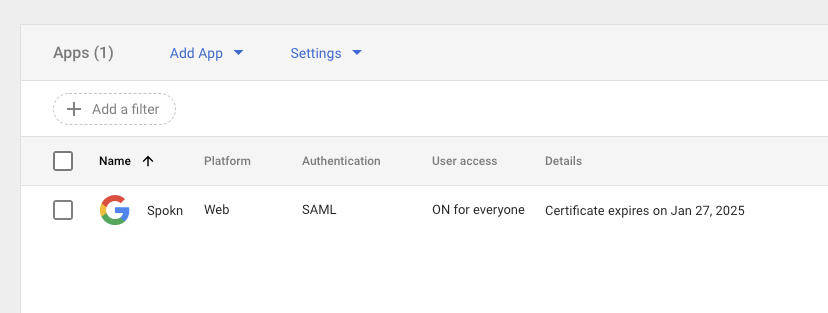
- Go to Apps -> SAML Apps
- Add custom SAML app
Creating the SSO Entry Point URL
The SSO Entry Point URL is a URL that your users will be directed to when they visit your Company account page. Unlike most identity providers, Google does not provide an easily accessible URL for this when creating the custom SAML application, so you must construct it.
Isolate the idpid from the SSO URL/Entity ID URL provided by Google. If you did not copy it down at the beginning of this process, it can be found by clicking the Download Metadata button. The idpid is the alphanumeric text located after "idpid=" in the Google Entity ID or SSO URL. It is shown in the modified screenshot below as 22222222222:
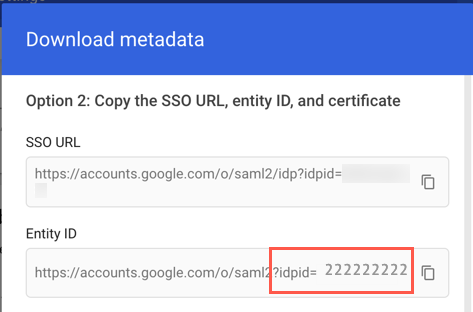
Isolate the spid. This is the identifier of your custom SAML app, and can be found in the URL of the custom SAML app's overview page, after /apps/saml. It is shown in the modified screenshot below as 111111111111:
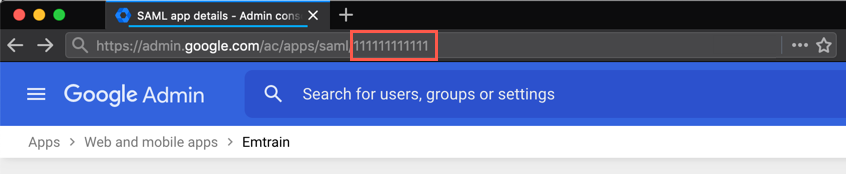
Create the SSO Entry Point URL by replacing the idpid and spid shown below with the idpid and spid specific to your account: https://accounts.google.com/o/saml2/initsso?idpid=22222222222&spid=111111111111
Set your SAML App attribute mapping
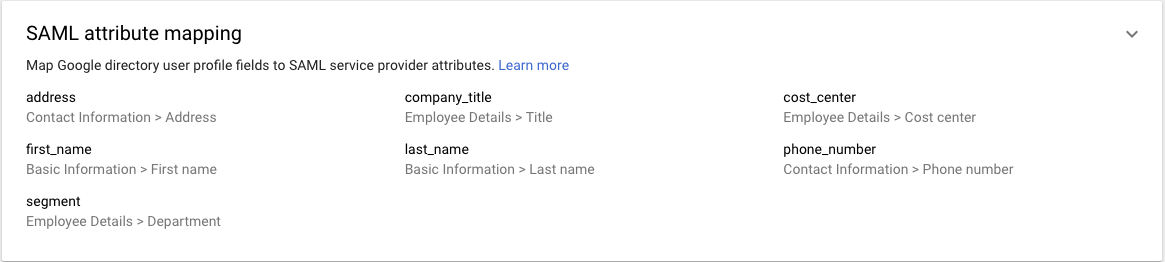
This part of the app will be used to set a mapping between Google data and Spokn data like Segment and company title
- Please map Department -> segment
- Please map Title -> company_title
- Please map First name -> first_name
- Please map Last Name -> last_name
Configuring Spokn (Final Step)
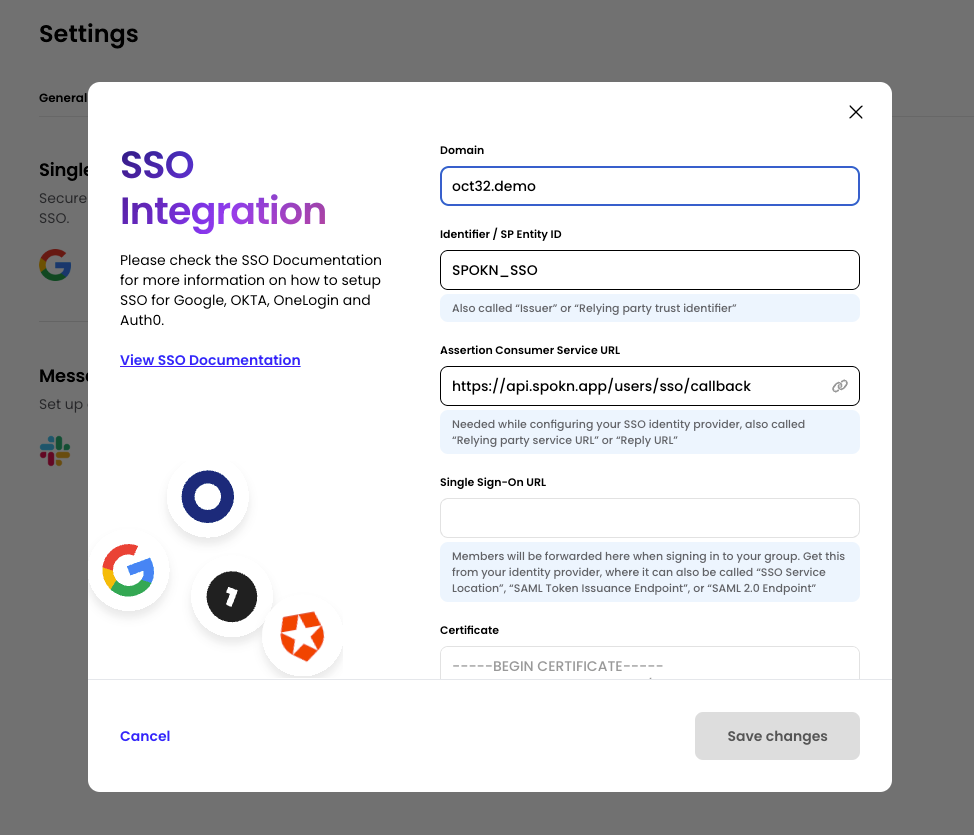
Please complete the following configuration to add SSO information to your company’s Spokn Account.
To update the portal with your SSO data:
- Visit the Spokn portal here: Setting SSO
- In “Integration” Tab, Select “Connect” in the “Single Sign On” Section
- In the Domain field, set your domain (ex. getspokn.com)
- Copy the Identifier / SP Entity ID (SPOKN_SSO) to yours SSO SP identifier (Also called: Audience Restriction/sp Entity ID)
- Copy Assertion Consumer service URL ( https://api.spokn.app/users/sso-web/callback ) to your Reply URL (Also called: SAML Callback URL or relying party URL)
- In Single sign-on URL, paste your SSO Entry URL (Also called: SSO service location or SSO Endpoint)
In Certificate, add the certificate from your IdP (no need to remove the begin/end part, it will be truncated automatically)