

Okta SSO
Last updated July 21, 2026
Configuring Okta SSO
- Load your Okta Admin console (admin.okta.com)
- You should create an application for Spokn
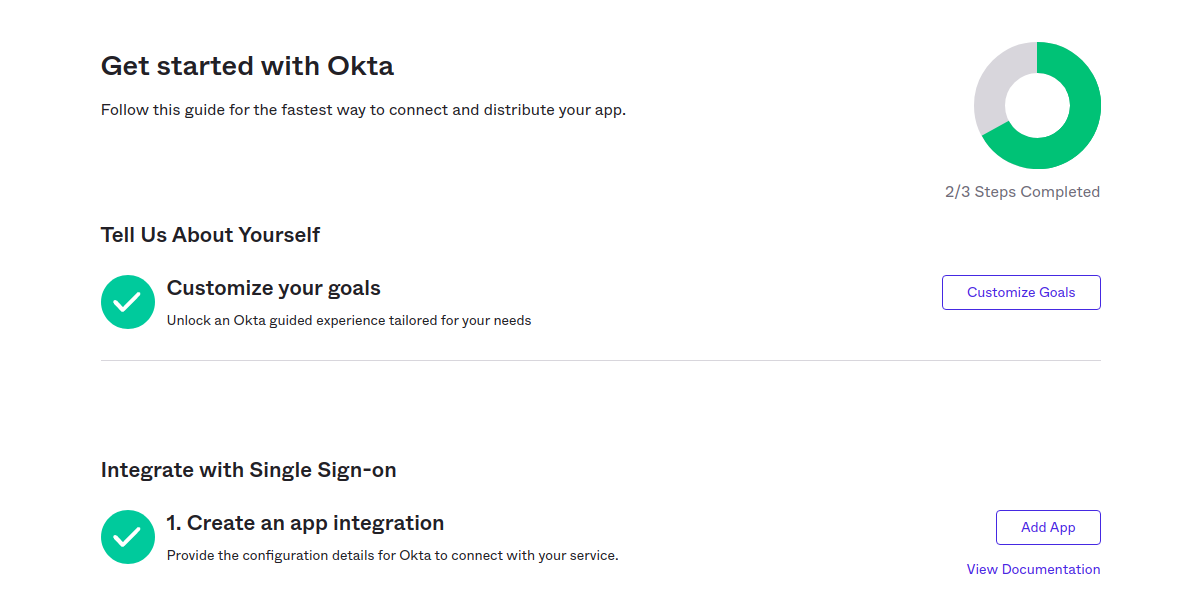
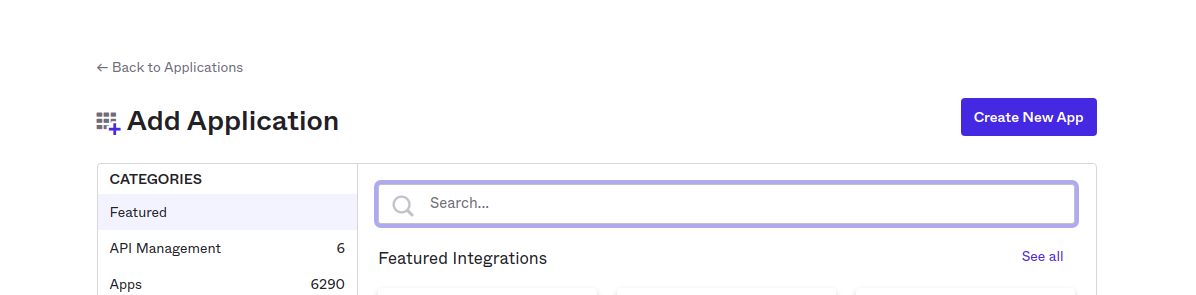
- Click “Add App,” then choose “Create New App”
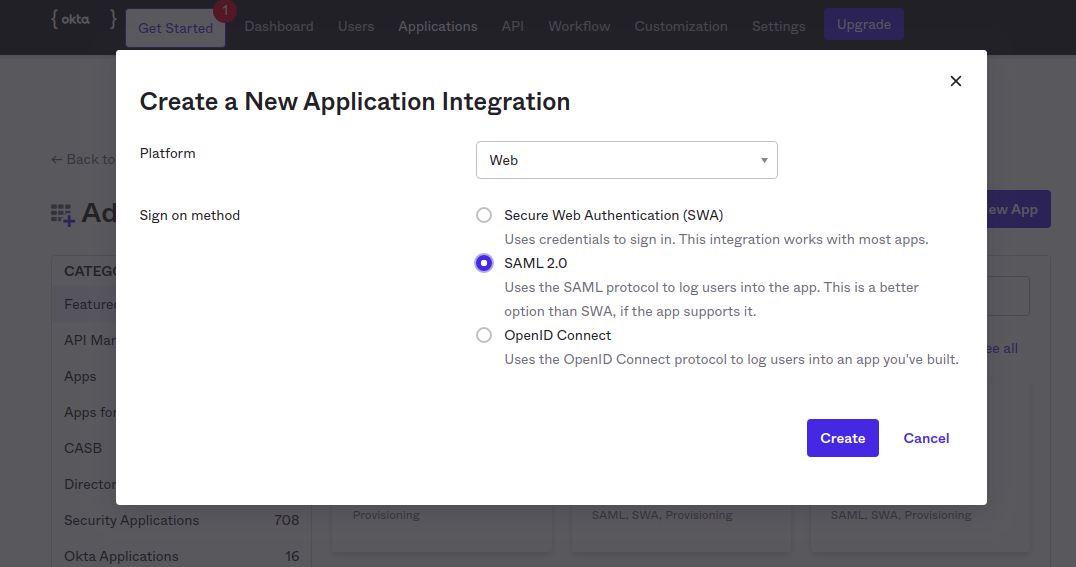
- Select SAML as sign in method
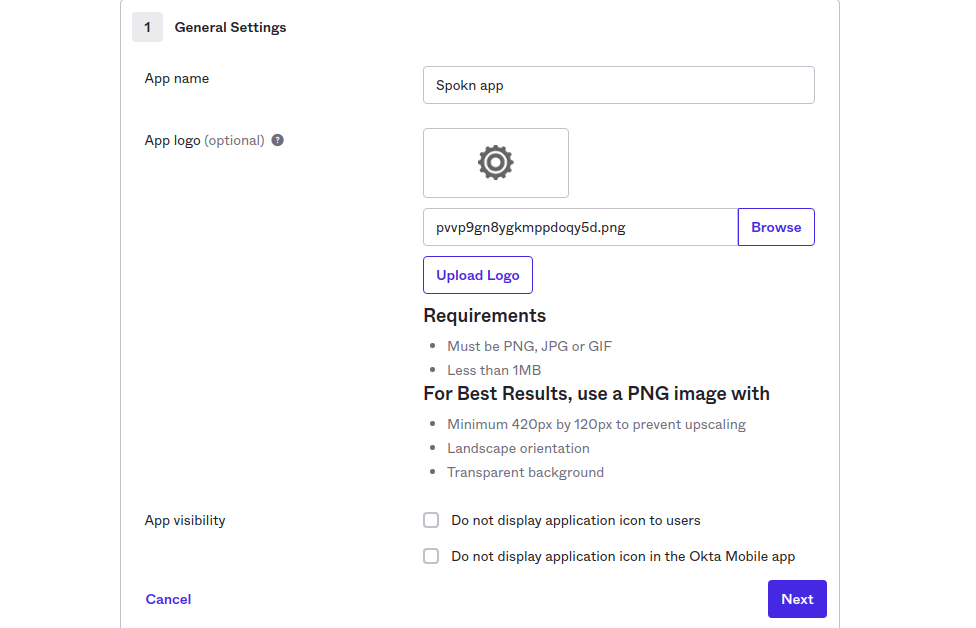
- Give it a name, upload the Spokn logo (found here ), and fill out the other options.
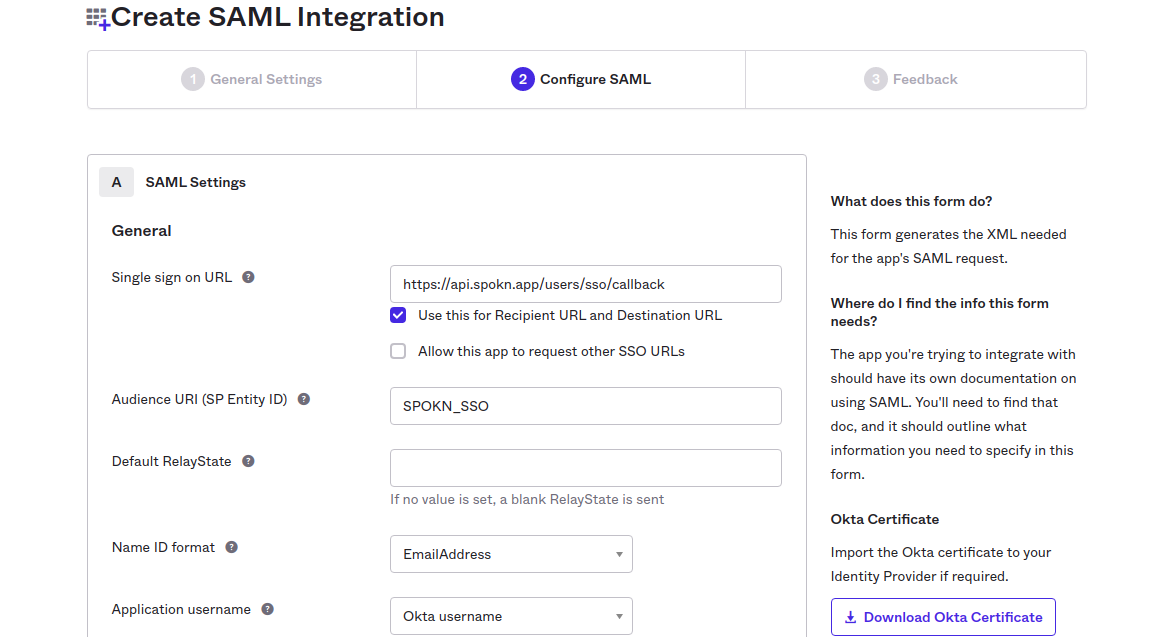
- Set the “Single sign on URL” with Spokn’s login URL: https://api.spokn.app/users/sso-web/callback
- Type a text string to identify Spokn as an audience, use: SPOKN_SSO
- Set the “Name ID format” to EmailAddress option.
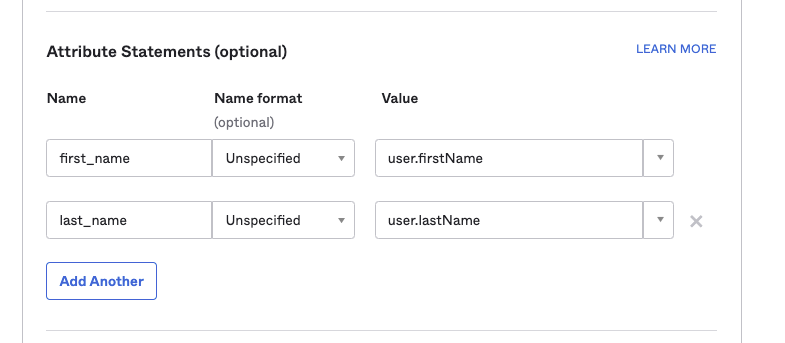
- Now you can map user’s attributes from OKTA side to Spokn app: Please map first_name -> user.firstName Please map last_name -> user.lastName Please map segment -> user.department (or the department field mapped in OKTA) Please map company_title -> user.title (or the title field mapped in OKTA)
- Now, submit the app.
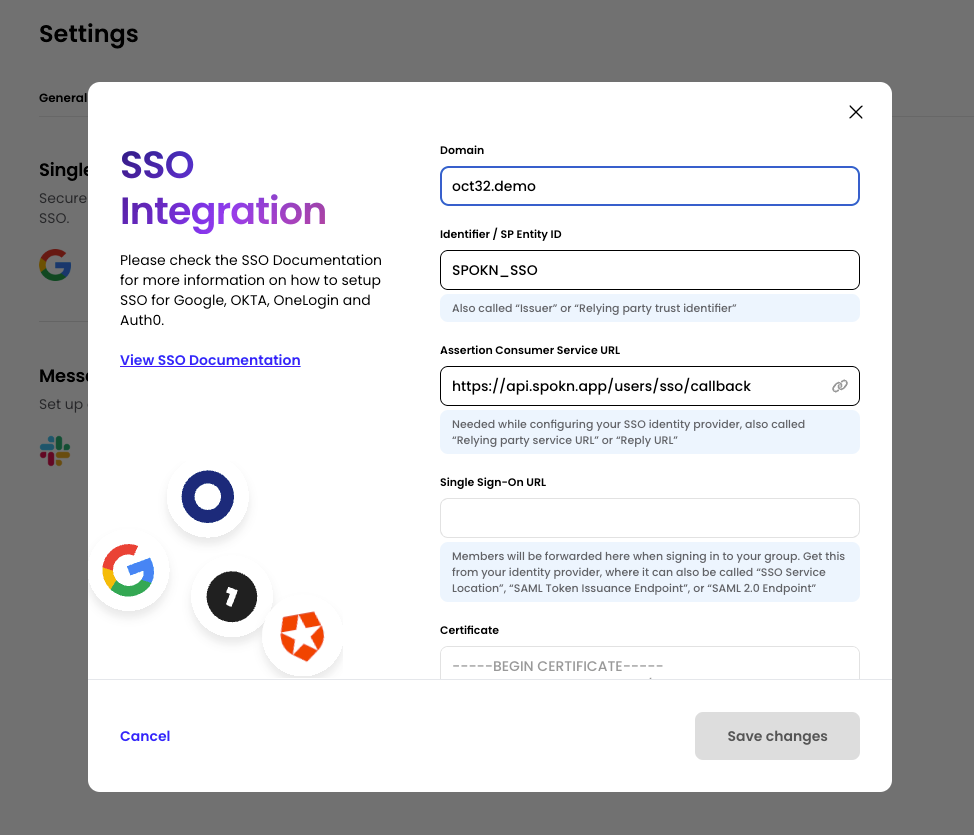
- You will find all of the Spokn app’s meta-data in the general tab where you go to your portal.Click on Spokn -> Settings -> SSO to fill out the fields as follows:
- Set your company’s domain Entry point is represent “Embed Link” in Spokn’s app on OKTA Reply-url should be the single sign on URL You will find the certificate when you try to edit SAML settings Update the audience restriction
- Assign applications to users
Assign applications to individual users so they can access them on their My Apps page. You can also assign applications to entire groups.
- In the Admin Console, go to Directory > People.
- Click a user name in the Person & Username column.
- Select the Applications tab.
- Click Assign Applications.
- Select applications from the list or enter the application name in the Search field.
- Click Assign.
- When necessary, enter the user name, password, and complete any additional fields. The user name is not the user's Okta username, but the username they use to sign in to the application.
- Click Save and Go Back.
Configuring Spokn (Final Step)
Please complete the following configuration to add SSO information to your company’s Spokn Account.
To update the portal with your SSO data:
- Visit the Spokn portal here: Setting SSO
- In “Integration” Tab, Select “Connect” in the “Single Sign On” Section
- In the Domain field, set your domain (ex. getspokn.com)
- Copy the Identifier / SP Entity ID (SPOKN_SSO) to yours SSO SP identifier (Also called: Audience Restriction/sp Entity ID)
- Copy Assertion Consumer service URL ( https://api.spokn.app/users/sso-web/callback ) to your Reply URL (Also called: SAML Callback URL or relying party URL)
- In Single sign-on URL, paste your SSO Entry URL (Also called: SSO service location or SSO Endpoint)
In Certificate, add the certificate from your IdP (no need to remove the begin/end part, it will be truncated automatically)
Was this article helpful?